Office renovation contractor Austin collaborating in a bright workspace.

Elevate Your Workspace: The Essential Guide to Choosing an Office Renovation Contractor Austin

Understanding Your Office Renovation Needs

In today’s fast-paced business environment, the design and functionality of your office space can significantly influence employee productivity and morale. As you embark on your renovation journey, it is crucial to clearly define your objectives and understand the nuances of the workspace you want to create. To streamline this process, collaborating with an Office renovation contractor Austin can provide valuable insights and operational expertise.

Identifying Objectives for Your Renovation

Before delving into any renovation project, defining clear objectives is essential. Whether you aim to improve collaboration, enhance brand presence, or create a more efficient workflow, identifying these goals will shape the entire renovation process. This section will explore different objectives, such as:

  • Boosting Employee Morale: A space that reflects your company culture can improve overall employee satisfaction.
  • Enhancing Functionality: Aim to optimize the workspace layout to facilitate smoother operations.
  • Incorporating Technology: As technology needs evolve, modernizing your office can help keep your team efficient and competitive.
  • Attracting Clients: A well-designed office can make a lasting impression on clients and visitors.

Budgeting for Your Office Renovation

Having a well-planned budget is critical for the success of your office renovation. It not only helps in determining the scale of your project but also prevents unexpected costs down the road. Here are some budgeting tips:

  • Comprehensive Estimates: Obtain detailed quotes from contractors to understand all potential expenses.
  • Allocate for Contingencies: Set aside a percentage of your budget for unforeseen expenses; a common recommendation is about 10-20%.
  • Estimate Time vs. Cost: Consider how timelines may affect overall costs due to potential disruptions in workflow.

Assessing Space Requirements

Understanding your spatial requirements is another foundational aspect of successful office renovations. Start with on-site assessments and employee feedback to gauge how current spaces are utilized. Important considerations include:

  • Growth Projections: Anticipating future needs based on your company’s growth can help prevent costly adjustments later.
  • Flexible Spaces: Design areas that can adapt to changing work styles or team dynamics.
  • Public vs. Private Areas: Analyze ratios for collaborative zones versus individual workstations to promote a balanced environment.

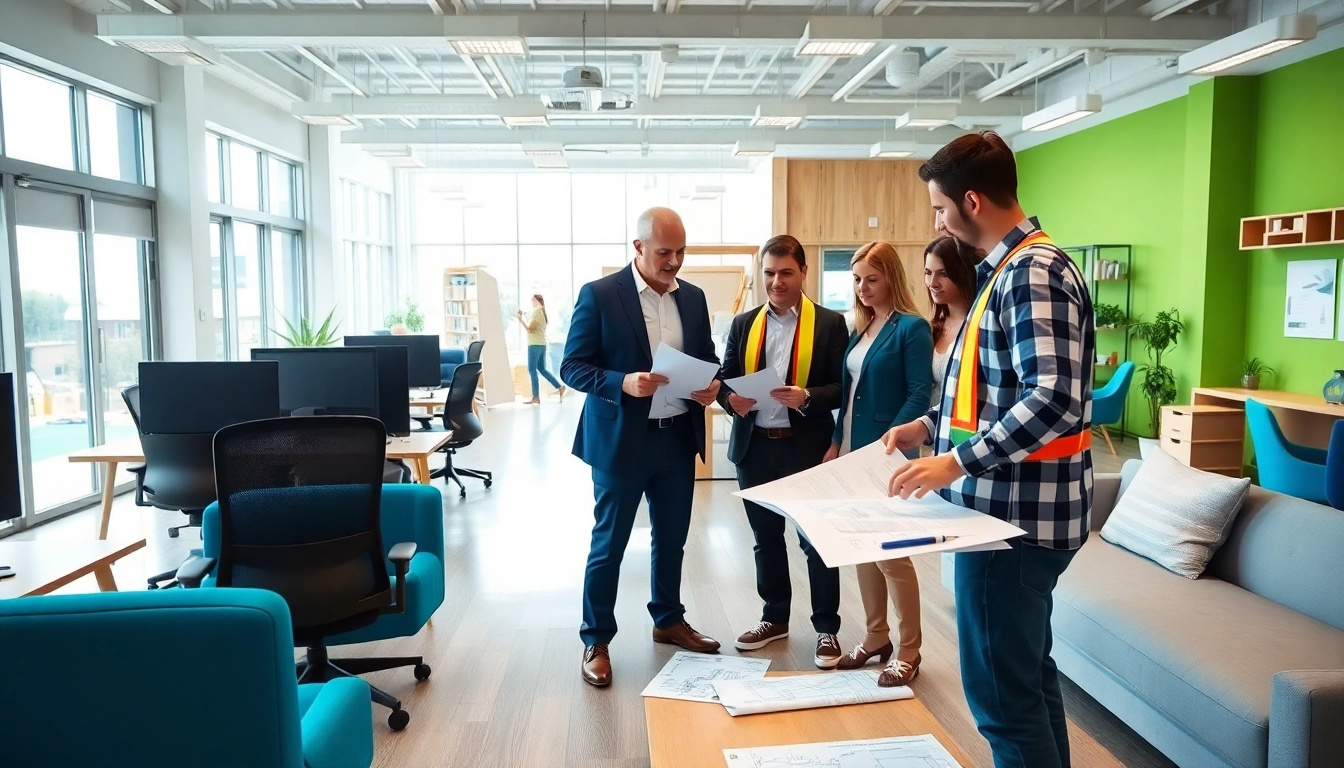
Selecting the Right Office Renovation Contractor Austin

The success of your office renovation heavily relies on the contractor you choose. Finding a reputable and experienced Office renovation contractor Austin can make all the difference. Here’s how you can ensure you’re making the right choice:

Evaluating Experience and Specializations

When selecting a contractor, it is important to evaluate their experience and area of specialization. Consider the following factors:

  • Portfolio Review: Examine past projects similar in scope and style to gain insights into their capabilities.
  • Specialization: Some contractors may focus on certain types of renovations or specific industries, which can be advantageous for your project.
  • Business Longevity: A contractor’s reputation often correlates with the number of years they have been in business.

Checking Credentials and References

Confirming a contractor’s credentials and seeking references is crucial in the selection process. Perform due diligence by:

  • Verifying Licenses: Ensure the contractor holds all necessary licenses and insurance required to operate legally.
  • Collecting Testimonials: Speak with previous clients to understand their experiences and satisfaction levels.
  • Performing Background Checks: Review any complaints or legal issues that may arise through public records.

Interviewing Potential Contractors

An interview can provide valuable insights into a contractor’s work ethic and approach to renovation. When interviewing potential contractors, consider asking questions like:

  • How do you handle project timelines?
  • What is your process for managing unexpected challenges?
  • Can you provide a detailed project plan?
  • What communication methods will you utilize?

Design Trends in Office Renovations

The landscape of office design is ever-evolving, shaped by changes in work culture, technology, and employee preferences. By incorporating contemporary design trends, you can create a space that is both functional and inspiring.

Incorporating Modern Design Elements

Modern design elements emphasize minimalism and functionality while providing an aesthetic appeal. Some key features to consider include:

  • Open Floor Plans: Utilize open spaces to encourage collaboration and communication among team members.
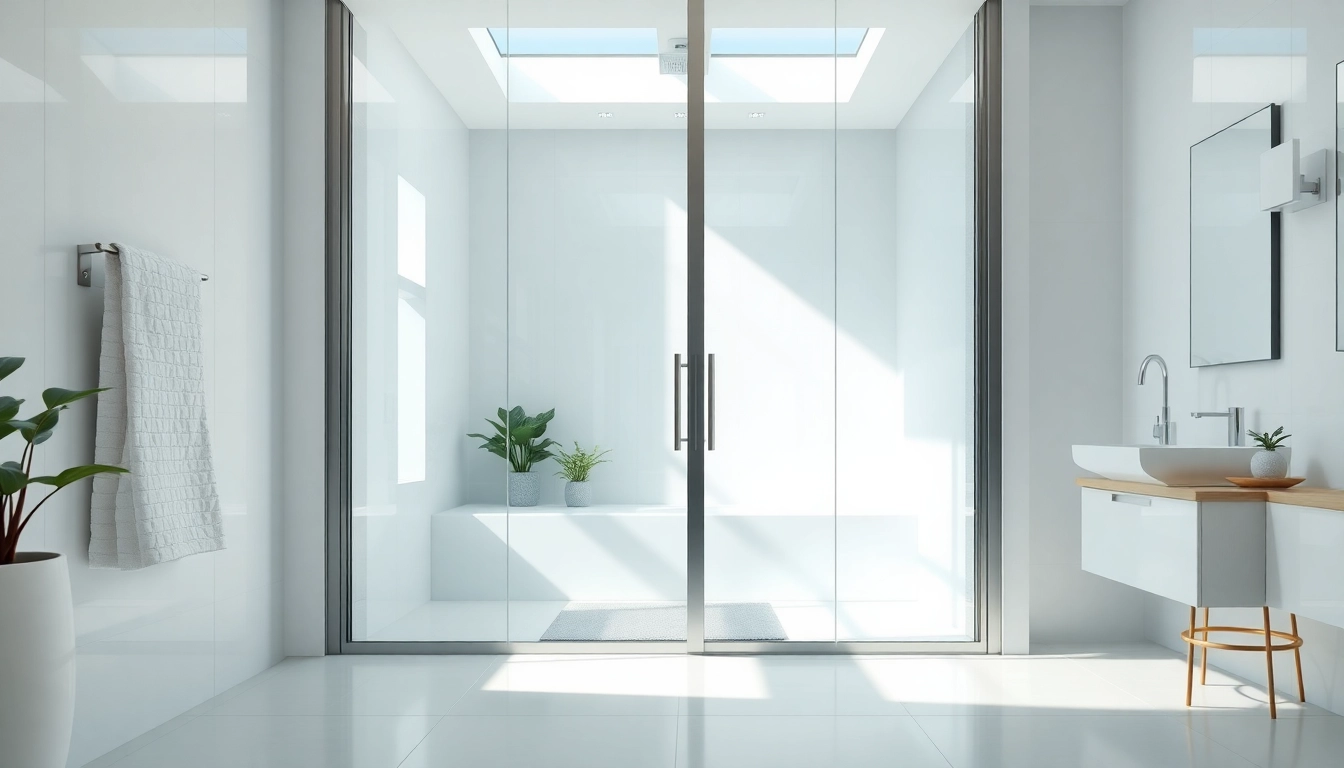
  • Natural Light: Maximize natural light through large windows or skylights to promote a healthier work environment.
  • Smart Technology: Integrating smart systems for lighting, temperature, and schedule optimization increases energy efficiency and comfort.

Sustainable and Eco-Friendly Practices

As sustainability becomes increasingly important, incorporating eco-friendly practices into your renovation not only reduces environmental impact but can also lower long-term costs. Consider these practices:

  • Recycled Materials: Use reclaimed wood or recycled composites in construction and furnishing.
  • Energy-Efficient Systems: Invest in systems like LED lighting and Energy Star appliances.
  • Indoor Greenery: Incorporating plants promotes air quality and boosts mood among employees.

Creating Collaborative Workspaces

In today’s work environment, encouraging collaboration through design is vital. Dedicated collaborative spaces, such as lounges or team rooms, can enhance teamwork. Focus on:

  • Flexible Furniture: Use movable furniture that can be reconfigured as needed for different group sizes.
  • Multifunctional Spaces: Designate areas that serve multiple purposes, accommodating presentations, informal meetings, or brainstorming sessions.
  • Technology Integration: Ensure that tech tools are available in collaboration spaces to facilitate efficient teamwork.

Managing Your Office Renovation Project

Effective project management is essential for a smooth renovation process. From timelines to communication strategies, various elements can dictate the success of your renovation.

Timeline and Phased Approaches

Understanding project timelines is significant for planning and execution. Break the project into phases, detailing each step from design approval to final touches. Key considerations include:

  • Set Realistic Deadlines: Create achievable timelines that allow for unforeseen delays while maintaining progress.
  • Phased Implementation: If you’re working in an occupied space, consider implementing renovations in phases to minimize disruptions.
  • Regular Checkpoints: Schedule consistent progress meetings to ensure the project stays on track.

Effective Communication Strategies

Maintaining clear communication can mitigate misunderstandings and keep everyone aligned. Consider employing effective strategies such as:

  • Establishing Communication Channels: Choose platforms that facilitate straightforward communication with your contractors and team.
  • Regular Updates: Share regular progress updates to keep stakeholders informed and engaged.
  • Feedback Mechanisms: Create opportunities for feedback from your team throughout the renovation process.

Addressing Common Challenges

During renovations, challenges typically arise, such as budget overruns or project delays. Prepare for potential issues by:

  • Identifying Risks: Anticipate issues that could surface and have contingency plans in place.
  • Prioritizing Quality: While budgets are significant, prioritize quality to avoid long-term problems from shortcuts.
  • Involving Employees: Keeping team members informed can prepare them for changes and foster a collaborative atmosphere.

Evaluating Post-Renovation Success

Upon completion of your office renovation, evaluating success is crucial for understanding its impact. Measuring effectiveness can guide future improvements and alterations.

Gathering Feedback from Employees

Understanding employee sentiment post-renovation is invaluable. Conduct surveys or hold focus groups to gather opinions on the new space. Key questions might include:

  • Do you feel more productive in the new space?
  • How does the new design reflect our company culture?
  • What improvements would you still like to see?

Measuring Productivity Improvements

Analyze productivity metrics to gauge whether the renovation has achieved its objectives. Consider these tools for measurement:

  • Performance Indicators: Use specific KPIs related to employee output, collaboration, and overall morale.
  • Comparative Analysis: Compare performance metrics before and after renovations to assess improvements.
  • Quality of Work: Evaluate the standard of work produced in the new space as feedback on its effectiveness.

Planning for Future Expansions

Success in renovation can lead to new challenges, including the need for future expansions. Plan proactively by:

  • Leaving Room for Growth: Design spaces with flexibility to allow future modifications without major renovations.
  • Regular Assessments: Continuously assess how well the space meets the evolving needs of your team.
  • Feedback Loops: Establish ongoing communication channels for employee feedback even after renovations.

Frequently Asked Questions

What should I look for in an Office renovation contractor Austin?

Look for experience, a strong portfolio, good references, and clear communication. These factors ensure you find a contractor who aligns with your vision and budget.

How long does an office renovation typically take?

The duration depends on the project size, typically ranging from a few weeks to several months. Discuss timelines during initial meetings with your contractor.

What are the costs associated with office renovation?

Costs vary significantly based on design choices, materials, and the contractor. Preparing a budget that includes all potential expenses helps in managing costs effectively.

Can I stay in my office during the renovation?

Staying is possible for minor renovations, but major projects typically require temporary relocation to ensure safety and reduce disruption.

What design trends should I consider for my office renovation?

Incorporate flexibility, collaborative spaces, eco-friendly materials, and modern aesthetics to create a dynamic and engaging work environment.

New York Construction Manager collaborating with workers at a construction site.

Top Skills Every New York Construction Manager Must Have for Success

Understanding the Role of a New York Construction Manager

The role of a New York Construction Manager is pivotal in the intricate world of construction projects. This position entails overseeing every facet of construction, from initial planning to project completion, ensuring not only the timely delivery of projects but also adherence to budget and quality standards. The uniqueness of the New York construction landscape, marked by its unique building codes, regulatory requirements, and urban logistical challenges, makes this role both exciting and challenging.

Defining Responsibilities as a New York Construction Manager

A New York Construction Manager is responsible for orchestrating a variety of tasks that include:

  • Coordinating project timelines and budgets
  • Supervising contractors and subcontractors
  • Ensuring compliance with building codes and safety regulations
  • Conducting site inspections and progress reports
  • Managing project documentation and communication

They act as the linchpin between stakeholders, ensuring smooth communication and effective resource allocation throughout the project lifecycle.

Key Skills Required for Effective Project Management

To excel as a New York Construction Manager, several skills are paramount:

  1. Leadership: Ability to motivate and guide teams through complex projects.
  2. Time Management: Efficiently prioritizing tasks to meet deadlines.
  3. Budgeting: Understanding financial aspects to prevent cost overruns.
  4. Technical Knowledge: Familiarity with construction methodologies and practices.
  5. Negotiation: Capability to negotiate contracts and resolve conflicts effectively.

These skills enable construction managers to drive projects toward successful outcomes while navigating the complexities of urban construction.

Challenges Faced by New York Construction Managers

The role of a New York Construction Manager comes with its own set of challenges:

  • Complex Regulatory Environment: Navigating extensive building codes and permits.
  • Urban Logistics: Managing logistics in densely populated areas.
  • Labor Shortages: Facing difficulties in finding skilled workers.
  • Budget Constraints: Adhering to strict financial limits often exacerbated by unexpected costs.
  • Supply Chain Issues: Dealing with delays in materials and products.

These challenges require a proactive approach and strong problem-solving skills to mitigate potential disruptions to project timelines.

Essential Soft Skills for a New York Construction Manager

Communication and Team Leadership Skills

Effective communication is essential for a New York Construction Manager. This role requires clarity in conveying expectations to a diverse group of stakeholders, including architects, clients, contractors, and workers. Strong leadership skills are equally important, as they foster a collaborative environment where team members feel valued and motivated.

Problem-Solving Approaches in Construction

Problem-solving in construction often involves quick thinking and creative solutions. Construction Managers must be adept at analyzing issues and developing strategic responses that maintain project momentum. Techniques such as root cause analysis and SWOT analysis can be beneficial in identifying underlying problems and potential solutions.

Negotiation Techniques for Effective Management

Negotiation is a critical component of a Construction Manager’s duties. Effective negotiation ensures fair contracts with vendors and contractors, as well as conflict resolution among team members. Emphasizing mutual benefit and clear communication can lead to more successful outcomes.

Technical Skills and Certifications for New York Construction Managers

Understanding Construction Software and Tools

In today’s tech-savvy world, a New York Construction Manager must be proficient with various construction management software. Tools such as Building Information Modeling (BIM), project management software (like ProCore or Autodesk), and scheduling applications enhance productivity and communication within project teams.

Importance of Safety Certifications

Safety is paramount in construction. Having certifications such as OSHA (Occupational Safety and Health Administration) training is crucial for Construction Managers, ensuring they understand and implement safety guidelines to protect workers and comply with regulations.

Staying Informed on Building Codes and Regulations

Given the dynamic nature of building codes, continuous education and training are vital for New York Construction Managers. They must stay updated on local regulations to ensure that all projects meet legal requirements and standards, minimizing the risk of penalties and project delays.

Best Practices for New York Construction Managers

Effective Project Planning Strategies

Successful projects begin with thorough planning. A robust project plan should include detailed timelines, budgets, and risk assessments. Construction Managers can utilize Gantt charts and project management software to visualize progress and anticipate challenges.

Utilizing Technology in Construction Management

Embracing technology by integrating advanced tools and software into daily operations enhances efficiency and accuracy. Mobile apps allow real-time updates, while IoT devices can provide insights into equipment performance, leading to optimized operations.

Importance of Sustainability in Construction Projects

With growing awareness about environmental issues, implementing sustainable practices has become vital. Strategies such as using eco-friendly materials and energy-efficient designs not only contribute to environmental protection but can also lead to cost savings and enhance project appeal.

Frequently Asked Questions about New York Construction Managers

What qualifications do I need to be a New York Construction Manager?

Typically, a bachelor’s degree in construction management, civil engineering, or related field is required, along with relevant work experience. Professional certifications can enhance job prospects further.

How does a New York Construction Manager ensure project success?

Project success is achieved through meticulous planning, effective communication, and proactive problem-solving. Engaging all stakeholders and using technology for project management also play crucial roles.

What is the average salary for a New York Construction Manager?

The average salary for a New York Construction Manager varies based on experience and project scope but typically ranges from $90,000 to over $150,000 annually, alongside potential bonuses.

How can I transition to a New York Construction Manager role?

To transition, gain relevant experience through internships or entry-level positions and pursue a degree in construction management. Networking and obtaining certifications can also facilitate the move into this role.

What role does technology play in a New York Construction Manager’s job?

Technology streamlines processes through project management software, enhances communication, and helps in data analysis and reporting, leading to higher efficiency and better decision-making.

Explore a modern shower design from sunny shower usa inc featuring sleek glass doors and vibrant tiles.

Elevate Your Bath Experience with sunny shower usa inc: Discover Trends and Innovations

The Evolution of Shower Design

Shower design has undergone a remarkable transformation, reflecting changes in technology, user preferences, and aesthetic trends. From rudimentary setups in ancient civilizations to today’s advanced installations, the evolution is a testament to our desire for better hygiene and comfort. Looking deeper into this journey allows us to appreciate how sunny shower usa inc captures modern-day innovations in shower systems.

Historical Perspectives on Showers

Historically, the concept of a shower can be traced back to ancient civilizations. The Greeks and Romans pioneered the use of communal bathing facilities, which featured rudimentary shower systems often serving social purposes. These early designs laid the foundation for personal hygiene practices that we now take for granted.

In the Middle Ages, bathing became less common, often viewed as a luxury, while the modern shower didn’t gain popularity until the late 19th century. With the advent of indoor plumbing and the industrial revolution, the shower evolved into a staple in Western homes, emphasizing convenience and cleanliness.

Modern Trends in Bathroom Design

Today’s shower systems reflect contemporary bathroom design trends emphasizing luxury, efficiency, and personalization. Minimalistic designs dominate, with frameless glass enclosures and streamlined fixtures that create a spacious feel. Smart technology integration in showers, such as thermostatic controls and multi-function showerheads, further enhances the experience, prioritizing user comfort.

Moreover, eco-friendly options are gaining momentum as sustainability becomes increasingly important. Bathroom fixtures now focus on reducing water consumption without sacrificing performance.

User Preferences and Expectations

Current users expect more than mere functionality from their showers; they seek an experience. This shift has prompted manufacturers to invest in features like customizable water flow, integrated lighting, and even music capabilities. Additionally, the rise in interest for spa-like experiences in the home has influenced shower design, with rain showerheads and body sprays becoming popular choices.

Understanding Components of a Quality Shower

Showerheads: Varieties and Features

Showerheads are the centerpiece of any shower system, and their variety can significantly influence the overall experience. Key types include handheld, rain, and multi-function showerheads. Handheld showerheads offer flexibility, ideal for rinsing and cleaning. Rain showerheads provide a luxurious, immersive feel, mimicking a gentle rainfall.

Modern units often feature adjustable settings, such as massage and mist options, allowing users to tailor their experience. When selecting a showerhead, consider factors like spray patterns, water pressure, and ease of cleaning.

Materials Choices: What Works Best?

Material selection is critical in ensuring durability and aesthetic appeal. Stainless steel and chrome are popular for their resistance to corrosion, while ceramic can add a touch of elegance. New innovations include antimicrobial materials that help reduce the buildup of bacteria and mold, ensuring a healthier shower environment. Ultimately, choosing materials should focus on both style and practicality.

Water Efficiency and Sustainability

With increasing concerns about water conservation, water efficiency has become a priority in shower design. Low-flow showerheads are highly effective in reducing water usage by limiting flow rates without diminishing the user experience. Studies show that switching to low-flow fixtures can save substantial amounts of water annually, aligning with sustainable living practices and reducing utility costs.

Designing Your Personal Oasis

Color Schemes and Ambient Design

Creating a personal oasis in your shower begins with thoughtful design choices, particularly color schemes. Soft, neutral tones can establish a calming environment, while bolder colors can inject personality and energy into the space. Lighting plays a crucial role as well; using dimmable LED lights can transform your shower experience, making it feel like a luxurious spa retreat.

Integrating Technology into Your Shower

Smart technology is revolutionizing how we experience showers. Integrations like voice-activated controls allow users to adjust temperature and water flow without touching any controls. Additionally, features such as Bluetooth connectivity for music playback can elevate the shower experience, catering to personal preferences.

Digital displays showing real-time water usage and temperature create transparency, encouraging mindful usage and sustainability.

DIY vs. Hiring Professionals

Deciding whether to handle shower installation or renovation as a DIY project or to hire professionals can be challenging. DIY may save costs, allowing for personal creativity in design, but it can also lead to mistakes if not done correctly. Hiring professionals often provides peace of mind and access to expert craftsmanship, particularly for complex plumbing changes or advanced installations. Ultimately, it is crucial to weigh the advantages and risks before making a decision.

Incorporating Accessories for Enhanced Functionality

Shower Caddies and Storage Solutions

Storage is critical in maintaining an organized shower space. Shower caddies, wall-mounted shelves, and corner baskets can help keep soaps and shampoos within reach without cluttering the environment. Consider vertical storage options to maximize space in smaller bathrooms, ensuring everything remains accessible and tidy.

Safety Features for Every User

Safety should never be overlooked when designing a shower. Non-slip mats, grab bars, and built-in seating accommodate users of all ages and abilities, minimizing the risk of accidents. Additionally, shower controls should be placed at a comfortable height for all users, enhancing safety and usability.

Luxury Accessories That Make a Difference

Investing in luxury accessories can transform an ordinary shower into a spa-like retreat. Consider adding features like a steam generator, chromotherapy lighting, or heated floors for enhanced relaxation. These elements create not just a shower but an experience that nourishes both body and mind.

Maintaining Your Shower: Best Practices

Regular Upkeep Tips

To ensure that your shower remains in optimal condition, regular maintenance is crucial. Simple practices include wiping down tiles after each use to prevent soap scum buildup and scheduling deep cleanings monthly. Regularly check and clean out drains to prevent blockages and maintain water flow.

Common Issues and Their Solutions

Common shower problems include leaks, mold growth, and mineral buildup from hard water. For leaks, immediate attention is vital; a simple tightening of screws or replacement of washers can often solve the issue. For mold, using mildew-resistant products can help, and regular cleaning with vinegar or baking soda can prevent its persistence.

Seasonal Care for Long-Lasting Beauty

Seasonal care takes into account changes in climate that can affect your shower. For example, in colder months, it’s beneficial to inspect for any cracks that could worsen with freezing temperatures. In warmer months, ensure ventilation systems are functioning properly to prevent humidity and mold growth.

Frequently Asked Questions

What are the benefits of using a rain showerhead?

Rain showerheads provide a relaxing, even water flow that mimics rainfall, improving the shower experience. They are often larger, enhancing coverage and comfort.

How can I improve water efficiency in my shower?

Using low-flow showerheads and fixing leaks can significantly reduce water usage while maintaining pressure, promoting sustainability and cost savings.

What design elements should I consider for a spa-like shower?

Incorporate soothing colors, natural materials, adequate lighting, and luxurious features like built-in seating or steam options to enhance the experience.

How often should I clean my shower?

For optimal hygiene, clean your shower at least once a week to prevent mold and soap scum buildup, ensuring a fresh and inviting environment.

What are some common shower maintenance issues?

Common issues include leaks, mold growth, and mineral buildup. Regular inspections and prompt repairs can prevent more significant problems and extend the lifespan of your shower.

Erleben Sie die eleganten Details einer duschkabine 100x100 pendeltür in einem modernen Badezimmer.

Elegante Gestaltung mit Duschkabine 100×100 Pendeltür für Ihr Badezimmer

Was ist eine Duschkabine 100×100 Pendeltür?

Definition und Merkmale

Eine duschkabine 100×100 pendeltür ist eine praktische Lösung für moderne Badezimmer, die sowohl Funktionalität als auch Eleganz vereint. Sie hat die Maße 100×100 cm, was sie zu einer idealen Wahl für kompakte Badezimmer macht. Pendeltüren zeichnen sich durch ihre Möglichkeit aus, sowohl nach innen als auch nach außen zu öffnen. Diese Flexibilität bringt nicht nur eine einfache Handhabung mit sich, sondern trägt auch zur Vermeidung von Platzproblemen bei. Die meisten Modelle sind aus hochwertigem Sicherheitsglas gefertigt, das nicht nur Sicherheit gewährleistet, sondern auch pflegeleicht und hygienisch ist.

Vorteile im Badezimmer

Die Installation einer Duschkabine 100×100 Pendeltür bietet zahlreiche Vorteile. Diese Duschkabine ermöglicht eine effektive Raumnutzung, insbesondere in kleineren Badezimmern, wo jeder Zentimeter zählt. Dank der Pendeltür können Benutzer bequem ein- und aussteigen, was die Nutzung der Dusche komfortabler macht. Zusätzlich trägt das Design oft zur Verbesserung des Raumklimas bei, da die Dampfbildung geregelt und die Luftzirkulation optimiert wird. Außerdem erleichtert das offene Design die Reinigung, da keine störenden Ecken vorhanden sind, in denen sich Schmutz ansammeln kann.

Materialien und Designs

Duschkabinen 100×100 Pendeltür sind in verschiedenen Materialien und Designs erhältlich. Glas ist das am häufigsten verwendete Material, da es modern und schick wirkt sowie eine klare Sicht auf das Badezimmer ermöglicht. Sicherheitsglas ist besonders beliebt, da es bruchsicherer ist und zusätzliche Sicherheit bietet. Der Rahmen kann aus verschiedenen Materialien wie Aluminium oder Edelstahl gefertigt sein, was nicht nur die Stabilität erhöht, sondern auch das Gesamtbild ästhetisch ansprechend macht. Designs reichen von minimalistisch bis hin zu verzierten Optionen, passend zu verschiedenen Einrichtungsstilen.

Tipps zur Auswahl der richtigen Duschkabine 100×100 Pendeltür

Maßangaben und Platzierung

Bei der Auswahl einer Duschkabine 100×100 Pendeltür sind genaue Maßangaben entscheidend. Es ist wichtig, die Höhe der Duschzone sowie die Breite zu berücksichtigen. Auch die Platzierung der Sanitäranlagen im Badezimmer sollte in die Überlegungen einfließen. Achten Sie darauf, dass genügend Platz für das Öffnen der Pendeltür vorhanden ist und berücksichtigen Sie die Bewegungsfläche, um eine gemütliche Nutzung der Dusche zu gewährleisten.

Stil und Funktionalität kombinieren

Die Kombination von Stil und Funktionalität ist bei der Auswahl Ihrer Duschkabine wichtig. Überlegen Sie sich, welcher Stil zu Ihrem Badezimmer passt: modern, rustikal oder vielleicht skandinavisch? Oft können Sie die Duschkabine mit Accessoires und Farben aufwerten, die den gesamten Raum harmonisch gestalten. Vergessen Sie nicht, Funktionalität mit ästhetischem Design zu verbinden – eine Duschkabine sollte nicht nur schön aussehen, sondern auch praktisch in der Nutzung sein.

Preis-Leistungs-Verhältnis beachten

Das Preis-Leistungs-Verhältnis ist ein weiterer wichtiger Aspekt bei der Auswahl einer Duschkabine 100×100 Pendeltür. Hochwertige Materialien und gute Verarbeitung haben ihren Preis, dafür erhalten Sie jedoch eine langlebige und robuste Lösung. Vergleichen Sie unterschiedliche Modelle und achten Sie darauf, welche Funktionen wirklich notwendig sind. Manchmal kann es sinnvoll sein, etwas mehr zu investieren, um langfristig Freude an Ihrer Duschkabine zu haben.

Häufige Probleme und Lösungen

Undichte Stellen und deren Behebung

Ein häufiges Problem bei Duschkabinen sind undichte Stellen, insbesondere an den Gelenken und Türdichtungen. Diese können durch Abnutzung oder unsachgemäße Installation entstehen. Um dies zu beheben, überprüfen Sie zunächst die Dichtungen und ersetzen Sie diese gegebenenfalls. Achten Sie darauf, die Duschkabine regelmäßig auf solche Mängel zu prüfen, um Wasserschäden oder Schimmelbildung zu vermeiden.

Reinigung und Pflege der Duschkabine

Die Reinigung einer Duschkabine 100×100 Pendeltür sollte regelmäßig erfolgen, um Kalk- und Seifenrückstände zu minimieren. Verwenden Sie geeignete Reinigungsmittel, die auf die Oberflächen abgestimmt sind. Vermeiden Sie aggressive Chemikalien, die das Glas oder die Dichtungen angreifen könnten. Eine wöchentliche Reinigung sorgt dafür, dass Ihre Duschkabine hygienisch bleibt und die Lebensdauer verlängert wird.

Einbauprobleme und deren Lösungen

Der Einbau einer Duschkabine kann manchmal problematisch sein, insbesondere für Ungeübte. Um Einbauprobleme zu vermeiden, ist es empfehlenswert, die Montageanleitung genau zu befolgen und bei Unsicherheiten professionelle Hilfe in Anspruch zu nehmen. Das richtige Werkzeug und die genauen Messungen sind entscheidend, um eine passgenaue Installation zu gewährleisten.

Trends in der Duschkabinen-Gestaltung

Moderne Technologien und Features

Moderne Duschkabinen integrieren häufig innovative Technologien, die den Komfort erhöhen. Dazu gehören z.B. digitale Thermostate, die eine präzise Temperaturregelung ermöglichen, oder sogar eingebaute Beleuchtungssysteme, die eine stimmungsvolle Atmosphäre schaffen. Auch Funktionen wie Antikalkbeschichtungen sind auf dem Vormarsch, um die Reinigung zu erleichtern und das Glas länger klar zu halten.

Farben und Stile, die angesagt sind

Die Farbgebung und das Design von Duschkabinen unterliegen genauso Wie anderen Einrichtungsgegenständen Trends. Zurzeit sind neutrale Töne wie Weiß, Grau und Schwarz sehr beliebt, da sie zeitlos und kombinierbar sind. Auch matte Oberflächen gewinnen an Beliebtheit, da sie einen modernen und eleganten Look bieten. Sie können die Duschkabine auch kreativ mit Fliesen in verschiedenen Farben und Mustern kombinieren, um Akzente zu setzen.

Integration in die gesamte Badezimmereinrichtung

Eine gelungene Duschkabine passt sich harmonisch in das Gesamtbild des Badezimmers ein. Überlegen Sie sich, wie Ihre Duschkabine mit anderen Elementen wie Badewanne, Waschbecken und den sanitären Einrichtungen harmonieren kann. Die Verwendung von ähnlichen Materialien und Farbtönen trägt dazu bei, ein stimmiges Gesamtbild zu schaffen und dabei das Badezimmer zu einem Wohlfühlort zu machen.

Wartung und Pflege der Duschkabine 100×100 Pendeltür

Regelmäßige Reinigungstipps

Um die Duschkabine 100×100 Pendeltür in einem einwandfreien Zustand zu halten, ist regelmäßiges Reinigen unerlässlich. Verwenden Sie milde Reinigungsmittel und stellen Sie sicher, dass Sie die Kabine nach jedem Gebrauch gründlich abspülen, um Ablagerungen zu vermeiden. Ein Wischer kann helfen, Wasserflecken zu reduzieren, bevor sie zu Kalkablagerungen werden.

Richtige Pflege für Langlebigkeit

Die richtige Pflege kann die Lebensdauer Ihrer Duschkabine erheblich verlängern. Stellen Sie sicher, dass alle Dichtungen intakt sind und bei Bedarf ersetzt werden. Vermeiden Sie es, schwere Gegenstände gegen das Glas zu stoßen, um Risse und Brüche zu verhindern. Achten Sie zudem auf eine geeignete Belüftung im Badezimmer, um Schimmelbildung vorzubeugen.

Professionelle Dienstleistungen in Anspruch nehmen

Es kann hilfreich sein, bei speziellen Problemen oder der Installation professionelle Dienstleistungen in Anspruch zu nehmen. Diese Fachleute verfügen über das notwendige Know-how und die Erfahrung, um Probleme schnell und effizient zu lösen. Sollten größere Eingriffe notwendig sein, sind sie in der Lage, fundierte Empfehlungen zu geben und die Qualität der Arbeit zu garantieren.

Häufig gestellte Fragen (FAQ)

FAQ 1: Was sind die Vorteile einer Duschkabine 100×100 Pendeltür?

Eine Duschkabine 100×100 Pendeltür bietet eine spannende Raumaufteilung, die leicht zugänglich und funktional ist. Sie spart Platz und verbessert die Gestaltung des Badezimmers.

FAQ 2: Wie messe ich den Platz für eine Duschkabine 100×100 Pendeltür?

Messungen sollten Höhe und Breite der Duschfläche sowie den Platz für die Öffnungsrichtung der Tür berücksichtigen. Achten Sie darauf, auch Abstände für Sanitäranlagen zu planen.

FAQ 3: Welche Materialien sind am besten für Duschkabinen geeignet?

Glas, Edelstahl und hochwertige Kunststoffe sind die beliebtesten Materialien. Sie sind langlebig, pflegeleicht und passen gut zu modernen Badezimmerstilen.

FAQ 4: Wie oft sollte ich meine Duschkabine reinigen?

Es wird empfohlen, die Duschkabine wöchentlich zu reinigen, um Kalk- und Seifenreste zu verhindern. So bleibt sie hygienisch und sieht immer neu aus.

FAQ 5: Ist die Installation einer Duschkabine schwierig?

Die Installation ist nicht ganz einfach und kann technische Kenntnisse erfordern. Bei Unsicherheiten ist es ratsam, professionelle Hilfe in Anspruch zu nehmen.

Schicke duschkabine 80x80 in modernem Badezimmer-Design mit eleganten Akzenten.

Die beste Wahl für Ihre Duschkabine 80×80: Stil und Funktionalität vereint

1. Warum eine duschkabine 80×80 wählen?

Die Wahl einer duschkabine 80×80 ist eine Entscheidung, die sowohl funktionale als auch ästhetische Überlegungen erfordert. Oftmals ist der verfügbare Raum in Badezimmern begrenzt, sodass die richtige Größe entscheidend für die Nutzung ist. In diesem Abschnitt werden die Vorteile der Größe, die Optimierung der Raumnutzung und die verschiedenen Designoptionen dieser Duschkabinen näher beleuchtet.

1.1 Vorteile der Größe

Die Größe 80×80 cm stellt einen ideales Gleichgewicht zwischen Komfort und Flächennutzung dar. Nutzer haben genug Platz, um sich beim Duschen zu bewegen, ohne das Gefühl von Enge zu verspüren. Gleichzeitig passt die Duschkabine in die meisten Badezimmerlayouts. Dies macht sie zur bevorzugten Wahl in städtischen Wohnungen und kleinen Familienhäusern.

1.2 Raumnutzung optimieren

Eine duschkabine 80×80 ermöglicht es, den verfügbaren Raum optimal zu nutzen. Diese Größe ist klein genug, um nicht viel Platz in einem kompakten Badezimmer einzunehmen, bietet jedoch gleichzeitig ausreichend Bewegungsfreiheit. Dadurch bleibt genug Platz für andere bedeutende Einrichtungsgegenstände wie Waschbecken und Toiletten, was die Gesamtästhetik und Funktionalität des Badezimmers verbessert.

1.3 Ästhetik und Designoptionen

Die Vielfalt an Designs, die für eine duschkabine 80×80 erhältlich ist, ist bemerkenswert. Von modernen rahmenlosen Modellen bis hin zu klassischen, gerahmten Varianten gibt es zahlreiche Optionen, die sich nahtlos in verschiedene Badezimmerstile einfügen. Transparentes Glas schafft ein Gefühl von Offenheit und Licht, während satiniertes Glas mehr Privatsphäre bietet. Diese ästhetischen Überlegungen können den Stil des gesamten Badezimmers erheblich beeinflussen.

2. Materialien für die Duschkabine

Die Wahl des Materials hat major Einfluss auf die Qualität, Langlebigkeit und Wartungsfreundlichkeit einer duschkabine 80×80. In diesem Abschnitt werden verschiedene Glasarten sowie die Unterschiede zwischen rahmenlosen und gerahmten Modellen besprochen.

2.1 Glasarten im Vergleich

Bei Duschkabinen wird häufig Sicherheitsglas verwendet. Es gibt verschiedene Arten, darunter klarsichtige, satiniert und gehärtetes Glas. Klarsichtige Gläser bieten maximale Sicht, während satinierte Gläser für mehr Privatsphäre sorgen. Gehärtetes Glas ist besonders widerstandsfähig und bruchsicher, was es zu einer bevorzugten Wahl für Badezimmer macht.

2.2 Rahmen vs. rahmenlos

Ein weiterer wichtiger Aspekt ist die Struktur der Duschkabine. Rahmenlose Duschkabinen bieten ein modernes und elegantes Design und sind leicht zu reinigen, da es weniger Ecken und Kanten gibt, in denen sich Schmutz ansammeln kann. Gerahmte Varianten sind oft kostengünstiger und bieten eine robuste Struktur, die besser geeignet ist, um schwere Türen zu unterstützen.

2.3 Pflegeleichte Oberflächen

Ein oft unterschätzter Aspekt ist die Pflegeleichtigkeit der Oberflächen. Viele moderne Duschkabinen sind mit speziellen Beschichtungen versehen, die das Anhaften von Wasser- und Seifenrückständen reduzieren. Dies erleichtert die Reinigung und trägt dazu bei, dass die Duschkabine länger in einem neuwertigen Zustand bleibt.

3. Installation der duschkabine 80×80

Die Installation einer duschkabine 80×80 erfordert präzise Planung und Vorbereitung. Hier wird eine Schritt-für-Schritt-Anleitung bereitgestellt, die nützliche Hinweise gibt, um häufige Fehler zu vermeiden.

3.1 Vorbereitende Maßnahmen

Vor der Installation sollten alle notwendigen Werkzeuge wie Bohrmaschine, Wasserwaage und Dichtungsmasse bereitliegen. Außerdem ist es wichtig, den Untergrund zu prüfen, um sicherzustellen, dass er eben und nicht beschädigt ist. Ein gut vorbereiteter Raum macht den Installationsprozess einfacher und effizienter.

3.2 Schritt-für-Schritt-Anleitung

Bei der Installation sollte zuerst die Basis der Duschkabine montiert werden. Danach werden die Wände angebaut, gefolgt von den Türen. Es ist wichtig, die Dichtungen gründlich anzubringen, um Wasserschäden zu vermeiden.

3.3 Häufige Fehler vermeiden

Ein häufiger Fehler ist die falsche Aushärtung der Dichtungsmasse, die zu Undichtigkeiten führen kann. Man sollte auch darauf achten, dass die Kabine beim Einbau gerade steht. Hier kann eine Wasserwaage sehr hilfreich sein.

4. Wartung und Pflege der Duschkabine

Um die Lebensdauer einer duschkabine 80×80 zu verlängern, spielt die regelmäßige Wartung eine entscheidende Rolle. In diesem Abschnitt geht es um die besten Reinigungsmittel, Techniken zur frühzeitigen Schadenserkennung und Tipps zur langfristigen Nutzung.

4.1 Reinigungsmittel und Techniken

Für die Reinigung eignen sich pH-neutrale Reinigungsmittel, um die Oberflächen nicht anzugreifen. Eine Mischung aus Essig und Wasser kann ebenfalls effektiv gegen Kalkablagerungen wirken. Vermeiden Sie aggressive Chemikalien, die das Glas und die Dichtungen beschädigen könnten.

4.2 Schäden rechtzeitig erkennen

Frühes Erkennen von Schäden an der Duschkabine, wie z.B. Risse im Glas oder Probleme mit den Dichtungen, ist wichtig. Regelmäßige Inspektionen können helfen, größere Reparaturen zu vermeiden und die Lebensdauer zu erhöhen.

4.3 Tipps zur langfristigen Nutzung

Um die Duschkabine in gutem Zustand zu halten, empfiehlt es sich, nach jedem Gebrauch die Wände mit einem Abzieher zu trocken. Dies reduziert die Bildung von Wasserflecken und Kalk, was die Reinigung erleichtert.

5. FAQs zur duschkabine 80×80

5.1 Wie viel Platz benötige ich für die Installation?

Für die Installation einer duschkabine 80×80 sollte mindestens ein Platz von 90 x 90 cm eingeplant werden, um genügend Bewegungsfreiheit und Zugang zu gewährleisten.

5.2 Kann ich die Duschkabine selbst installieren?

Ja, die Installation einer duschkabine 80×80 ist mit etwas handwerklichem Geschick selbst durchführbar. Achten Sie jedoch auf die Anweisungen des Herstellers, um Fehler zu vermeiden.

5.3 Wie reinige ich meine Duschkabine effizient?

Verwenden Sie pH-neutrale Reinigungsmittel und einen Abzieher nach jeder Nutzung, um Kalk- und Seifenablagerungen zu minimieren und die Reinigung zu erleichtern.

5.4 Welche Duschkabine ist die beste für kleine Badezimmer?

Eine duschkabine 80×80 ist ideal für kleine Badezimmer, da sie optisch viel Platz bietet und sich leicht in jeden Raum integrieren lässt.

5.5 Wo finde ich die besten Angebote für Duschkabinen?

Online-Shops und Fachgeschäfte bieten oft die besten Angebote und Rabatte. Achten Sie auf Sales und Paketangebote für zusätzliche Einsparungen.

Showcase of a modern shower base shower in a beautifully designed bathroom

Elevate Your Bathroom with the Perfect Shower Base Shower

1. Understanding the Importance of a Shower Base Shower

When it comes to renovating or building a bathroom, the choices we make can greatly influence both functionality and aesthetics. A shower base shower is a critical component that brings together these two elements. It not only provides a solid foundation for your shower space but also contributes to the overall design and style. Opting for a high-quality shower base shower can set the right tone and ensure durability and comfort for years to come.

Why Choose a Quality Shower Base Shower?

The shower base acts as the foundation of your shower area, protecting the walls and floors from water damage and providing a place for proper drainage. A quality shower base ensures that water flows correctly to the drain, preventing pooling and potential mold growth. Moreover, a well-designed shower base enhances the safety of your space. The risk of slipping is notably reduced, particularly in wet conditions, making a quality option integral to any bathroom layout.

Types of Shower Base Showers Available

Shower bases come in various types and configurations, each suited for different needs and styles:

  • Prefabricated Shower Bases: These are ready-made bases that are easy to install, often made from acrylic or fiberglass.
  • Tile Shower Bases: These allow for maximum customization but require a more complicated installation process. They offer a luxurious feel and myriad design options.
  • Linear Drain Shower Bases: Also known as trench drains, they provide an aesthetically pleasing way to manage shower drainage and are ideal for larger shower areas.

Key Features to Look For

When selecting a shower base shower, consider the following features:

  • Size and Shape: Ensure it fits well within your bathroom layout.
  • Material: Look for options that balance durability with aesthetics.
  • Slip Resistance: Safety should be a priority in material choice.
  • Drainage System: Proper drainage prevents water pooling and reduces mold risks.

2. Materials Used in Shower Base Showers

Popular Material Choices for Shower Bases

The material chosen for your shower base significantly impacts both performance and design. Common materials include:

  • Acrylic: Lightweight and easy to install, acrylic is a popular choice offering a smooth surface that is easy to clean.
  • Fiberglass: Similar to acrylic, fiberglass is affordable and features slip-resistant options. However, it may be prone to scratching.
  • Concrete: Provides a unique rustic finish and can be customized but requires professional installation.
  • Stone: Natural stone offers elegance and durability but necessitates more maintenance.

Durability vs. Aesthetics: Finding the Right Balance

While aesthetics play an essential role in the selection of materials, durability should not be overlooked. Aesthetic choices may create a stunning visual impact, but if the material cannot withstand moisture or frequent use, it becomes a costly mistake. Balancing these two aspects will yield the best results.

Maintenance Tips for Different Shower Base Materials

Different materials necessitate distinct maintenance approaches:

  • Acrylic: Clean regularly with mild soap and water; avoid abrasive cleaners.
  • Fiberglass: Use gentle cleaners; be careful of scratching.
  • Concrete: Requires sealing to prevent moisture damage; clean with a pH-neutral cleaner.
  • Stone: Needs periodic sealing to maintain its appearance and resist stains.

3. Installation Guidelines for Shower Base Showers

Preparing Your Bathroom for a Shower Base Shower

Before diving into installation, it’s critical to prepare your bathroom. Remove any existing fixtures or flooring to provide a clean workspace. Ensure that plumbing and drainage systems are functional and up to code, as this will prevent complications during installation.

Step-by-Step Installation Process

When installing a shower base shower, follow these steps:

  1. Position the shower base in the desired spot, ensuring it is level and secure.
  2. Connect the drain assembly and test for leaks.
  3. Apply suitable adhesive or mortar to the base and set it in place.
  4. Ensure that the perimeter is sealed effectively to prevent water from leaking out.
  5. Once installed, allow adequate drying time based on material specifications before proceeding with adjacent fixtures and tiling.

Common Mistakes to Avoid During Installation

Installation can be delicate, and common mistakes typically include:

  • Not ensuring a level base, which can cause water pooling.
  • Failing to check for proper drainage beforehand, leading to clogs later on.
  • Inadequate sealing around edges, which increases the risk of water damage.

4. Enhancing the Experience with Shower Accessories

Best Accessories to Complement Your Shower Base Shower

Investing in quality accessories can elevate your shower experience. Consider incorporating:

  • Shower Mats: They provide safety while enhancing aesthetics.
  • Shower Curtains or Doors: These minimize water spills and add brilliancy.
  • Water Softening Units: Easy-to-install items that enhance the longevity of your shower base.

Showerhead Options to Consider

The type of showerhead you choose significantly affects your comfort. Consider options like:

  • Rainfall Showerheads: Offer a luxurious and soothing experience.
  • Adjustable Showerheads: Provide flexibility for different heights and preferences.
  • Handheld Showerheads: Ideal for versatility, especially in family households.

Storage Solutions for a Clutter-Free Space

To maximize your shower area, select appropriate storage solutions such as corner shelves or built-in niche storage to keep essentials organized and accessible. Wall-mounted storage options can free up floor space and add a contemporary touch.

5. Frequently Asked Questions About Shower Base Showers

How do I know which shower base is right for my bathroom?

Consider your bathroom layout, personal style, and durability needs to select a fitting shower base.

Can I install a shower base by myself?

While DIY installation is possible, professional help is advisable for complicated plumbing and ensuring proper sealing.

What are the best materials for shower bases?

Acrylic, fiberglass, and natural stone are popular choices, each offering distinctive benefits based on aesthetics and durability.

How can I maintain my shower base shower?

Regular cleaning with appropriate products and sealing based on material type enhances longevity and appearance.

Are there eco-friendly shower base options available?

Yes, many manufacturers now offer sustainable materials and finishes that contribute to eco-friendly bathroom designs.

Admire the exquisite elegant led mirror reflecting a stylish bathroom setting.

Enhancing Your Space with an Elegant Led Mirror: Style and Functionality

1. What is an Elegant Led Mirror?

1.1 Definition and Features

An elegant led mirror is a sleek, modern bathroom accessory that combines functionality with aesthetics. These mirrors are not only designed to reflect your image but also feature integrated LED lighting that enhances visibility and adds a stylish touch to any space. Most elegant led mirrors come with features such as adjustable brightness, touch sensors, various shapes, and sizes, and some even include anti-fog technology.

1.2 Benefits of Elegant Led Mirrors

The benefits of elegant led mirrors are numerous. Firstly, they provide superior lighting, which is especially beneficial for grooming and makeup application. Secondly, the LED lights are energy-efficient, reducing energy consumption compared to traditional lighting options. Additionally, these mirrors add a contemporary flair to bathrooms and other areas, enhancing the overall décor. Furthermore, many elegant led mirrors boast features such as dimming capabilities and color temperature options, allowing for personalized lighting experiences.

1.3 Ideal Spaces for Use

Elegant led mirrors are incredibly versatile and can be used in various settings. While they are popular in bathrooms, they also find their place in entryways, dressing rooms, and bedrooms. In bathrooms, they can create a focal point above sinks or vanities. In dressing rooms, they help in selecting outfits and applying makeup. Their stylish appearance also makes them suitable for glamorous setups in hallway entries or lounge areas, making them multifunctional as well as beautiful.

2. Choosing the Right Elegant Led Mirror

2.1 Size and Shape Considerations

When choosing an elegant led mirror, consider the size and shape that will best fit the intended space. Larger mirrors can make a bold statement and create an illusion of space in smaller areas, while smaller mirrors can serve as accent pieces. Rounded mirrors often provide a softer look, while rectangular options can lend a more modern feel. It’s essential to measure available wall space and determine how the mirror’s dimensions will complement existing decor.

2.2 Frame Styles and Finishes

The frame of an elegant led mirror can significantly influence its overall style. Options range from minimalist designs in stainless steel or frameless variants for a sleek look, to ornate frames in gilded or antique finishes that add character. Selecting the right frame style depends on the desired aesthetic; contemporary spaces typically benefit from simpler frames, while traditional settings might favor more decorative options to enhance their timeless charm.

2.3 Lighting Options and Energy Efficiency

Lighting options play a crucial role in the functionality of an elegant led mirror. Many mirrors come with adjustable brightness settings, allowing users to customize the light intensity according to their needs. Additionally, energy-efficient LED options can significantly reduce electricity costs over time, making them a sustainable choice. Consider mirrors that offer color temperature adjustment as well, enabling you to switch between warm and cool light, thus mimicking natural daylight for the best results.

3. Installation and Maintenance Tips

3.1 Installation Steps for Elegant Led Mirrors

Installing an elegant led mirror typically involves a few straightforward steps. First, gather the necessary tools, such as a drill, screws, and a level. Once you have these at hand, determine the desired height for the mirror and mark the wall. It’s best to use wall anchors if the mirror is heavy. Following this, drill holes and secure the mounting brackets. Finally, hang the mirror carefully, ensuring it is level and securely fixed.

3.2 Cleaning and Care Best Practices

To maintain the pristine condition of an elegant led mirror, it’s important to follow proper cleaning practices. Use a soft, lint-free cloth to wipe the mirror surface to avoid scratches. For cleaning solutions, a mixture of water and mild soap or a dedicated glass cleaner is recommended. Avoid abrasive materials or harsh chemicals that can damage the reflective surface and frame. Regular cleaning will prevent buildup and keep the mirror looking new.

3.3 Troubleshooting Common Issues

Common issues with elegant led mirrors may include flickering lights or a dim display. If you experience flickering, check the wiring connection and ensure everything is securely attached. In case of a dim light, check if the brightness setting has been accidentally adjusted. If the mirror has an anti-fog feature that malfunctions, ensure the sensors are clean and unobstructed. Most issues can be resolved with these simple troubleshooting techniques.

4. Elevating Decor with Elegant Led Mirrors

4.1 Integrating Mirrors into Bathroom Design

Integrating elegant led mirrors into bathroom design can enhance both functionality and aesthetics. Place the mirror above the sink or vanity to create a central visual focus. Pair it with attractive lighting features or stylish fixtures to create a harmonious look. The reflective surface of the mirror can also create depth and make the bathroom feel more spacious. Additionally, consider coordinating the mirror frame with other bathroom accessories for a cohesive design theme.

4.2 Using Mirrors to Enhance Small Spaces

In small spaces, elegant led mirrors can act as powerful decorative elements that visually enlarge the area. Positioning mirrors across from windows can reflect natural light, further amplifying the sense of space. Choose slim-framed or frameless mirrors to contribute to an airy feel. Additionally, placing mirrored furniture in conjunction with an elegant led mirror can create a stylish synergy that adds sophistication to tight quarters.

4.3 Creative Decor Ideas with Mirrors

To creatively enhance decor with elegant led mirrors, consider using multiple mirrors arranged in a gallery wall format. This approach not only adds visual interest but also increases the light reflection in the room. Using mirrors of various shapes can add a playful touch to the design. In addition, using mirrors as part of a focal piece around fireplaces or as accents in living areas can elevate the overall design and make the space feel more luxurious.

5. Frequently Asked Questions

5.1 Are elegant led mirrors energy-efficient?

Yes, elegant led mirrors typically feature energy-efficient LED lighting, which uses less electricity and has a longer lifespan compared to traditional bulbs.

5.2 How do I choose the right size mirror?

To select the right size, measure the space available and consider the proportions of the surrounding decor for a harmonious fit.

5.3 Can I install an elegant led mirror myself?

Yes, you can install an elegant led mirror yourself with basic tools and following the manufacturers’ installation instructions.

5.4 What are the features of high-quality led mirrors?

High-quality led mirrors often include adjustable lighting, anti-fog functionality, touch controls, and durable finishes that resist wear.

5.5 How do I clean my mirror without damaging it?

Use a soft, lint-free cloth with water and mild soap or glass cleaner. Avoid abrasive materials to prevent scratching the surface.

Modern shower sliding doors showcasing elegance and functionality in a stylish bathroom.

Enhance Your Bathroom Aesthetics with Shower Sliding Doors

Understanding Shower Sliding Doors

What are Shower Sliding Doors?

Shower sliding doors are a popular choice for modern bathrooms, primarily due to their space-saving design and aesthetic appeal. Unlike traditional hinged doors that require ample clearance to swing open, sliding doors consist of panels that move horizontally along a track system. This functionality is particularly advantageous in smaller bathrooms, maximizing usability without compromising style. Made from glass and often framed with durable materials, shower sliding doors can easily enhance the overall look of your bathroom, creating a sleek and open environment.

Benefits of Shower Sliding Doors

Shower sliding doors offer a myriad of benefits that make them a preferred option for homeowners:

  • Space Efficiency: Their sliding mechanism requires minimal space, which is especially beneficial in compact bathrooms.
  • Aesthetic Appeal: Available in various designs and materials, they can elevate the look of any bathroom.
  • Easy Accessibility: The smooth sliding action provides effortless access in and out of the shower.
  • Improved Water Containment: Many sliding doors are engineered to prevent water leakage, keeping your bathroom dry.
  • Low Maintenance: With fewer grooves and seals than framed doors, cleaning is easier and less time-consuming.

Overall, opting for shower sliding doors can significantly enhance the functionality and aesthetics of your bathroom space.

Choosing the Right Material

Materials play a crucial role in the performance, durability, and aesthetics of shower sliding doors. The most common materials include:

  • Tempered Glass: Known for its safety and strength, tempered glass is resistant to breakage and can endure temperature changes.
  • Frameless Glass: Provides a more modern, seamless look and is easier to clean compared to framed options.
  • Framed Glass: Adding extra support, framed doors typically come in a variety of finishes and colors to match different décor styles.
  • Vinyl: Often used in lower-cost options, vinyl can offer sufficient durability and is generally easier to maintain.

When selecting the appropriate material, consider factors such as safety, design preferences, and budget constraints.

Installation Considerations for Shower Sliding Doors

Pre-Installation Measurements

Before proceeding with the purchase of shower sliding doors, it is imperative to take precise measurements of your shower space. This includes measuring the width of the opening where the doors will be installed, the height from the shower base to the top of the opening, and the depth of the shower area to ensure optimal functioning. Additionally, consider the wall’s integrity and finish to determine whether modifications are necessary prior to installation.

Tools Needed for Installation

A successful installation of shower sliding doors typically requires these tools:

  • Measuring tape
  • Level
  • Drill and drill bits
  • Screwdriver
  • Silicone caulk for sealing
  • Stud finder (if necessary)
  • Hammer and chisel (for adjustment of existing framework)

Ensuring you have the right tools before beginning will facilitate a smoother installation process.

Step-by-Step Installation Guide

Installing shower sliding doors can be a fulfilling DIY project. Here’s a step-by-step guide:

  1. Gather Materials: Collect all necessary tools and components outlined in your door kit.
  2. Prepare the Opening: Make sure the area is clean and that no obstructions will hinder the installation.
  3. Install the Track: Using a level, mark the track position on the wall. Drill the holes for mounting and secure the track with screws.
  4. Hang the Door Panels: Place the panels onto the track, ensuring they glide smoothly.
  5. Seal the Edges: Use silicone caulk to seal any gaps around the frame, reducing the risk of leakage.
  6. Final Adjustments: Make any necessary adjustments to ensure the doors close properly and align evenly.

Following these steps will help ensure a professional-grade installation of your shower sliding doors.

Common Issues with Shower Sliding Doors

Identifying Typical Problems

Like any installation, shower sliding doors can experience their share of common issues. These include:

  • Water Leakage: Often caused by improper sealing or misalignment.
  • Sticking Doors: Dirt or debris can accumulate on the tracks, making the doors difficult to open.
  • Noise During Operation: Lubrication may be required if the tracks or rollers are dry.
  • Cracks or Chips: Impact damage can compromise the integrity of the glass, making it necessary to replace panels.

Maintenance Tips for Longevity

Proper maintenance can extend the lifespan of your shower sliding doors considerably. Consider these tips:

  • Regularly clean the glass with non-abrasive cleaners to prevent soap scum build-up.
  • Check the tracks for debris and clean as needed to ensure smooth operation.
  • Apply silicone lubricant to the rollers periodically to maintain seamless sliding.
  • Inspect seals and gaskets for any signs of wear and replace them if necessary to prevent leaks.

When to Seek Professional Help

If you encounter persistent issues despite proper cleaning and maintenance, it’s advisable to consult a professional. Additionally, if you are not comfortable with installation or repair, hiring an expert can ensure correct and safe handling, protecting your investment in the long run.

Design Options for Shower Sliding Doors

Framed vs. Frameless Designs

The choice between framed and frameless shower sliding doors impacts both style and functionality:

  • Framed Designs: These doors come with an aluminum framework, which can enhance durability and provide support for heavier glass panels. They can be a great option for larger shower spaces and are available in various finishes.
  • Frameless Designs: Offering a sleek and modern look, frameless doors provide a sense of openness and space. They are typically made entirely of tempered glass and can create an impression of luxury. However, installation may require professional assistance due to their weight.

Color and Finish Choices

Beyond the structure, the color and finish of the shower sliding doors play a crucial role in the overall design aesthetics:

  • Brushed Nickel: Offers a contemporary look and resists water spots.
  • Chrome: A classic finish that exudes elegance and pairs well with a variety of bathroom styles.
  • Black Matte: Becomes increasingly popular for a minimalist and sophisticated style.

Choosing the right finish can tie together your bathroom’s theme and complement other fixtures harmoniously.

Trendy Design Ideas

To maximize your bathroom’s overall design, consider the following trendy ideas for shower sliding doors:

  • Textured Glass: Textured panels can provide privacy while adding an artistic element to the space.
  • Sliding Bypass Doors: Allowing you to slide one door in front of the other, maximizing space efficiency.
  • Custom Patterns: Engage a designer to create unique glass etchings or patterns that reflect personal style.

Investing in trendy designs can significantly enhance the visual appeal and user experience of your bathroom.

FAQs about Shower Sliding Doors

Are shower sliding doors easy to clean?

Yes, most shower sliding doors come with easy-to-clean surfaces and materials that resist water stains, simplifying maintenance.

Can shower sliding doors fit in any bathroom?

Shower sliding doors are versatile but require sufficient space. Accurate measurements are essential before purchase to ensure a proper fit.

What materials are best for shower sliding doors?

Common materials include tempered glass for safety, aluminum for durability, and vinyl for lower maintenance needs.

Do shower sliding doors need a bottom track?

While many designs include a bottom track for smooth operation, there are also trackless options available for a cleaner look.

How can I prevent water leakage from shower sliding doors?

Proper sealing and regular maintenance checks can significantly reduce the chances of leakage and ensure optimal performance.

Apply winter car protection Chattanooga service to ensure gleaming and smooth car finish.

Stay Protected: Essential Tips for Winter Car Protection Chattanooga

Understanding Winter Car Protection Chattanooga

Winter weather poses a myriad of challenges for vehicle owners, particularly in regions like Chattanooga. Understanding the importance of winter car protection Chattanooga is essential for keeping your vehicle safe and well-maintained during these challenging months. This comprehensive guide will delve into the significance of protecting your car in winter, the common hazards it faces, and the advantages of employing professional services.

Importance of Protecting Your Vehicle

The importance of protecting your vehicle during winter cannot be overstated. Cold temperatures, ice, and harsh weather can lead to significant wear and tear on your car’s exterior and overall systems. A proper protection plan minimizes the risk of rusting, paint damage, and mechanical failures, ensuring longevity and reliability. In addition, a well-maintained vehicle can improve resale value, which can yield significant financial benefits in the long run.

Common Winter Hazards for Cars

Winter hazards come in various forms. Ice and snow can create slippery driving conditions, while road salt, which is commonly used to melt ice, can lead to corrosion on your car’s undercarriage. Additionally, freezing temperatures may cause battery damage, tire pressure fluctuations, and even oil thickening, making it imperative for vehicle owners to adopt protective measures.

Benefits of Professional Protection Services

While DIY solutions are available, enlisting professional winter protection services offers numerous benefits. Experts possess the knowledge and tools needed to deliver comprehensive services, including high-quality protective coatings, undercoating, and regular maintenance checks. Professional services ensure that your vehicle receives the attention it deserves, significantly extending its lifespan and enhancing its appearance.

Choosing the Right Products for Winter Protection

Types of Protective Coatings

Selecting the appropriate protective coating is paramount for winter vehicle maintenance. Options include ceramic coatings, wax, and sealants, each boasting unique benefits. Ceramic coatings are ideal for long-lasting protection against scratches and contaminants, while wax provides a more budget-friendly option, though it may require more frequent application. Sealants offer a balance between durability and cost, making them a popular choice among car owners.

Essential Tools for DIY Protection

If you prefer to protect your vehicle through DIY methods, having the right tools is essential. Key items include a microfiber wash mitt, high-quality wax or sealant, a clay bar kit for removing contaminants, and detailing brushes for cleaning intricate areas. A high-pressure washer can also be advantageous for cleaning surfaces before applying any protective coating.

How to Select High-Quality Products

When selecting products for winter car protection, consider factors such as compatibility with your vehicle’s paint, durability against winter elements, and customer reviews. Researching brands and securing products that offer a warranty can also be beneficial to ensure satisfaction and effectiveness in protecting your vehicle.

Preparing Your Vehicle for Winter

Steps for an Effective Initial Clean

The first step in preparing for winter protection is an effective vehicle wash. Begin with a thorough exterior wash using a pH-balanced car shampoo to remove dirt and contaminants. Pay special attention to the wheel wells and undercarriage, as these areas often accumulate road salt. After washing, use a clay bar to remove any embedded contaminants before drying your vehicle with a microfiber towel.

Applying Protective Coatings Techniques

Once your vehicle is clean and dry, applying protective coatings requires careful technique. Start in a shaded area to prevent the product from drying too quickly. Apply the coating using a high-quality applicator as directed, allowing intervals for curing as specified by the manufacturer. This will ensure an even and effective application. Following this, don’t forget to buff the surface using a soft cloth to enhance the shine and durability of the coating.

Scheduling Regular Maintenance Visits

Maintaining a consistent schedule for routine checks and services is essential for winter protection. Regular visits to a professional detailing service can help ensure that the protective coatings remain effective throughout the winter. This proactive approach can also catch any potential issues early, preventing more extensive repairs down the line.

DIY vs. Professional Winter Car Protection Chattanooga

When to Choose DIY Solutions

DIY solutions can be effective for those who enjoy hands-on projects or seek to save costs. If you are familiar with vehicle maintenance and have ample time, undertaking winter car protection yourself can provide satisfaction and valuable experience. It’s essential, however, to ensure you have the necessary knowledge and tools to achieve a high-quality finish.

Advantages of Hiring Professionals

Hiring professionals to handle winter car protection brings numerous advantages. Experienced technicians offer expertise that can significantly extend your car’s lifespan while applying advanced techniques and products that might be unfamiliar to DIYers. Moreover, they can identify unseen issues and address them proactively, ensuring your vehicle stays in optimal condition throughout the winter months.

Cost-Benefit Analysis for Each Approach

When assessing whether to undertake winter protection as a DIY task or hire professionals, consider the cost against the benefits. While DIY is generally less expensive upfront, it might lead to increased costs if mistakes occur. Professional services, though pricier initially, often yield longer-lasting results and save money on repairs in the long run, making it a worthy investment.

Keeping Your Car Safe and Looking Great

Long-term Care Tips for Winter

In addition to initial winterization, long-term care is vital for vehicle protection during the winter months. Regularly washing your vehicle helps remove salt and grime buildup, making it less susceptible to corrosion. Investing in a good quality cover can provide additional protection from harsh weather elements when the car is parked. Don’t forget to check your tire pressure regularly, as cold temperatures can cause it to drop.

Signs That Your Car Needs Protection Reapplication

Being vigilant for signs that your vehicle may need reapplication of protective coatings can save you future headaches. Look for decreased shine, visible scratches, or areas where water is no longer beading off the surface. If you notice that the protective layer appears worn or loses its effectiveness, it’s time to consider reapplying.

FAQs on Winter Car Protection Chattanooga

1. How often should I apply protective coatings for winter?

It’s recommended to apply protective coatings every 6 to 12 months, depending on the type of product used and exposure to harsh conditions.

2. Can I wash my car in winter?

Yes, washing your car in winter is essential to remove road salt and grime. Just avoid washing in freezing conditions to prevent water from freezing on your vehicle.

3. What is the best protective coating for winter?

Ceramic coatings are among the best for winter protection due to their durability and resistance to harsh elements, followed by high-quality sealants.

4. Do I need a professional for winter car protection?

While DIY options exist, professionals typically offer higher quality application of protective products and ensure thorough cleaning and maintenance checks.

5. How can I tell if my vehicle is protected?

Indicators include a shiny finish, water beading on the surface, and a smooth feel to the paint. If these signs diminish, it may need reapplication.

Innovative Techniques in Car Protective Services

The landscape of car protective services is continuously evolving, with innovations like hydrophobic coatings and advanced ceramic solutions gaining traction. These technologies provide exceptional barrier functions against contaminants, UV rays, and harsh weather while maintaining a vehicle’s appearance. Professional services often utilize these advanced methods to ensure the utmost protection for your vehicle during winter.

How to Extend the Life of Your Vehicle’s Finish

To extend your vehicle’s finish, consider regular detailing, applying protective coatings regularly, and parking in shaded areas or garages to minimize UV exposure. Additionally, avoid automated car washes that can scratch the finish; instead, opt for hand washes or touchless systems for the best results.

Complete the uk eta online application with confidence in a modern workspace.

Effortlessly Complete Your uk eta Online Application: A Step-by-Step Guide

Understanding the uk eta Online Application Process

What is the uk eta Online Application?

The uk eta online application is a digital application system that facilitates travelers from eligible countries to visit the United Kingdom for short stays. ETA stands for Electronic Travel Authorization, which allows travelers to enter the UK without requiring a full visa for specific purposes, such as tourism, business meetings, or family visits. This process is designed to streamline entry, ensuring security and efficiency for both travelers and border authorities.

Key Eligibility Requirements

To apply for the uk eta online application, travelers must meet certain eligibility requirements. Typically, the following criteria apply:

  • Citizens of eligible countries: Only citizens of selected countries are allowed to use the ETA system. Ensure to check the latest list of qualified nations.
  • Purposes of visit: Applicants must be traveling to the UK for tourism, short-term business activities, or to visit family and friends. Long-term residency or employment is not permitted with an ETA.
  • Valid passport: Applicants must possess a passport that is valid for the duration of their stay in the UK.
  • Health and character checks: Travelers may be asked to provide information regarding their health and character as part of the application process.

Documents Needed for the Application

Gathering the necessary documents is crucial for a successful application. Here’s a list of essential documents needed:

  • A valid passport: Ensure that it is not close to expiration.
  • Personal identification details: This includes your full name, date of birth, and contact information.
  • Travel itinerary: Outlining your intended dates of travel and places you plan to stay in the UK.
  • Financial proof: Evidence demonstrating the ability to support yourself during your stay, such as bank statements or pay slips.
  • Travel insurance: Although not mandatory, having insurance can offer peace of mind during your travels.

Navigating the Online Application Form

Step-by-Step Guide to Filling Out the Form

Completing the application form is straightforward if you follow these steps:

  1. Visit the official application website.
  2. Begin the application by selecting the appropriate form for the uk eta online application.
  3. Provide all necessary personal and travel information accurately.
  4. Upload required documents as prompted by the application system.
  5. Double-check all entries for accuracy to avoid delays.
  6. Submit your application and pay any applicable fees.

Common Mistakes to Avoid

When completing the uk eta online application, applicants often make errors that can lead to denials or delays. Here are frequent pitfalls to watch out for:

  • Providing incorrect personal information: Ensure your name, date of birth, and nationality match your passport.
  • Missing essential documents: Check that all required documentation is included before submission.
  • Ignoring application guidelines: Follow all instructions related to format and length of information provided.
  • Not reviewing before submitting: Always review your application to catch typographical errors or omissions.

Best Practices for Successful Submission

To enhance the chances of a smooth application process, consider these best practices:

  • Start the application early: Allow sufficient time for processing and any potential follow-up questions.
  • Be honest and accurate: Provide true information; discrepancies can lead to denials.
  • Keep copies of submitted documents: Retaining a copy may assist you in case of any follow-up requirement.
  • Use a reliable internet connection: Avoid interruptions that could prevent successful submission.

After Submission: What to Expect

Processing Times and Notifications

After submitting your application, it will be processed typically within a few days. However, applicants should prepare for potential delays during peak travel seasons. Notifications regarding the status of your application will usually be communicated via email or through the online portal.

How to Handle Missing or Incorrect Information

In case you realize that you’ve submitted incorrect or missing information:

  • Contact customer service promptly if possible.
  • If your application is still pending, you may be able to provide corrections.
  • If already processed, you may need to apply again and submit the correct information.

Tracking Your Application Status

Most application platforms provide a tracking system. You can use your application reference number to check the status of your uk eta online application. Ensure you keep your reference number safe to access updates promptly.

Tips for a Smooth Travel Experience

Preparing for Your Trip After Approval

Once your application has been approved, there are several preparations to ensure a smooth trip:

  • Review travel restrictions: Always check for any travel guidelines specific to your destination within the UK.
  • Book accommodations in advance: Secure your stays to avoid last-minute issues.
  • Familiarize yourself with local customs and regulations: Knowing what to expect can enhance your travel experience.

Understanding Travel Restrictions

While the uk eta allows for smoother entry, travelers should be aware of any ongoing restrictions that may be in place, such as:

  • Health-related protocols, such as vaccination requirements.
  • Local safety guidelines depending on the region in the UK you are visiting.
  • Specific entry requirements associated with your nationality.

Staying Informed on Travel Guidelines

Travel policies can shift frequently. It is advisable to stay updated by:

  • Checking reputable travel advisory websites.
  • Signing up for alerts from official UK travel sites.
  • Consulting your country’s travel advisory services before departure.

FAQs about the uk eta Online Application

What is the cost associated with the uk eta online application?

The application fee for the uk eta online application varies but is generally minimal and typically includes the processing of your documents.

How do I modify my application after submission?

To modify your application, contact customer support immediately. Some changes may be feasible depending on the current processing status.

Can I apply for multiple entries with a single application?

No, the uk eta online application permits only a single entry. Multiple entries will require separate applications.

Is there customer support if I need assistance?

Yes, customer support is available to assist with queries about the application process or any issues you encounter.

What happens if my application is denied?

If denied, you will receive an explanation. You may need to address any issues and submit a new application for consideration.