Colonial home renovation showcasing traditional features with modern upgrades in a serene setting.

Revitalizing Tradition: Insights into Colonial Home Renovation

Understanding Colonial Home Renovation

Renovating a colonial home presents a unique opportunity to blend history with modern utility. As these homes possess distinct architectural elements and rich histories, the process of renovation requires thoughtful planning and execution. In this article, we delve into the key aspects of colonial home renovation, exploring design trends, material choices, and crucial planning steps to ensure a successful transformation.

What Is a Colonial Home?

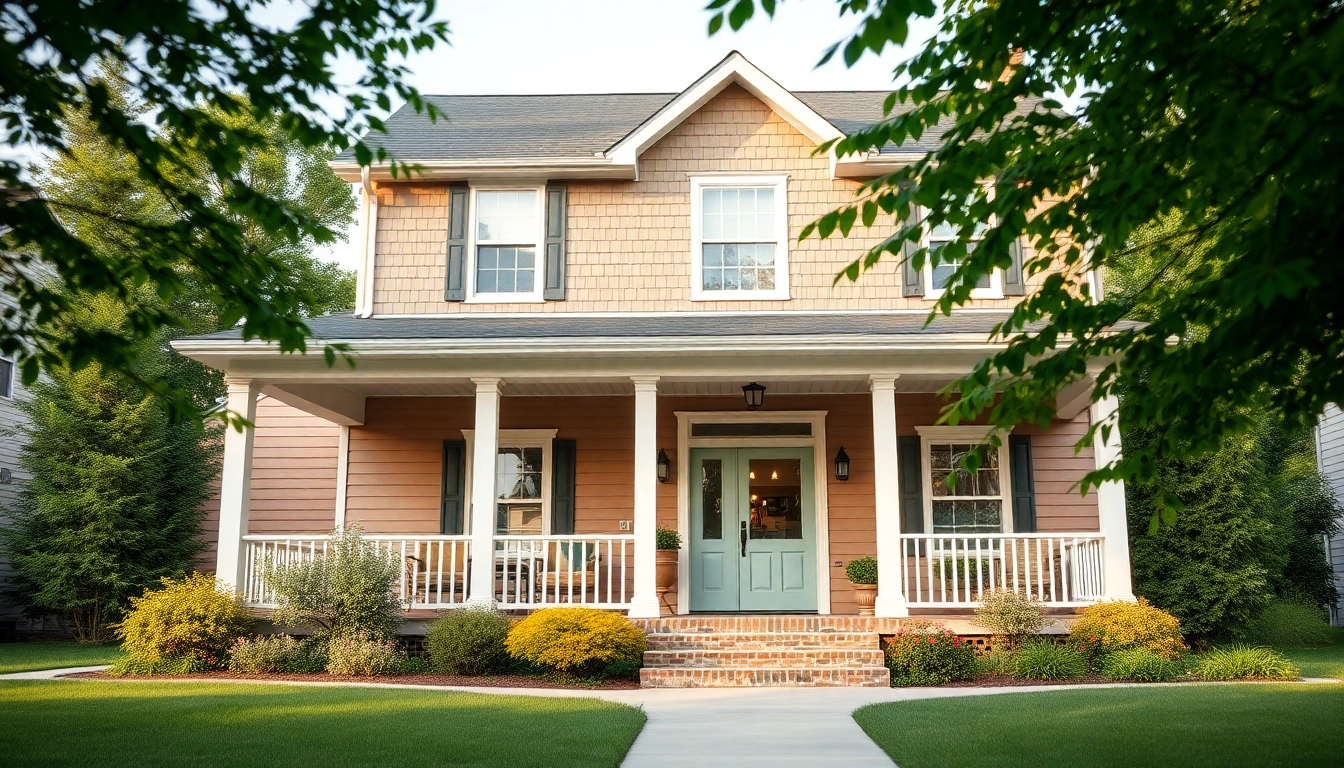
A colonial home refers to a style of architecture that thrived in America during the colonial period, spanning from the 1600s to the 1800s. These homes are characterized by their symmetrical structures, steep roofs, and centrally located front doors, often flanked by evenly spaced windows. Various regional styles emerged from the colonial framework, such as Cape Cod, Georgian, and Dutch Colonial, each bringing unique features reflective of their cultural backgrounds. Understanding these key characteristics is vital during renovation.

Importance of Colonial Home Renovation

Renovating colonial homes is crucial not only for preserving architectural history but also for adapting these structures to modern living standards. Colonial homes often require updates for energy efficiency, plumbing, and electrical systems, which can enhance comfort and reduce utility costs. Moreover, thoughtful renovations can increase property values, ensuring these historical treasures remain assets for future generations.

Common Characteristics of Colonial Homes

Colonial homes exhibit several timeless characteristics, including:

  • Symmetry: Colonial houses are generally symmetrically designed, making them visually appealing and harmonious.
  • Exterior Materials: Often built from brick or wood, these homes embrace local materials, showcasing craftsmanship.
  • Classic Roof Designs: Colonial homes typically feature gable roofs, which add to their architectural elegance.
  • Defined Entryways: Grand, central doorways usually adorned with decorative elements set the tone for the home.

Planning Your Colonial Home Renovation

Identifying Key Areas for Renovation

Start your renovation journey by identifying which areas of the home need attention. Focus on:

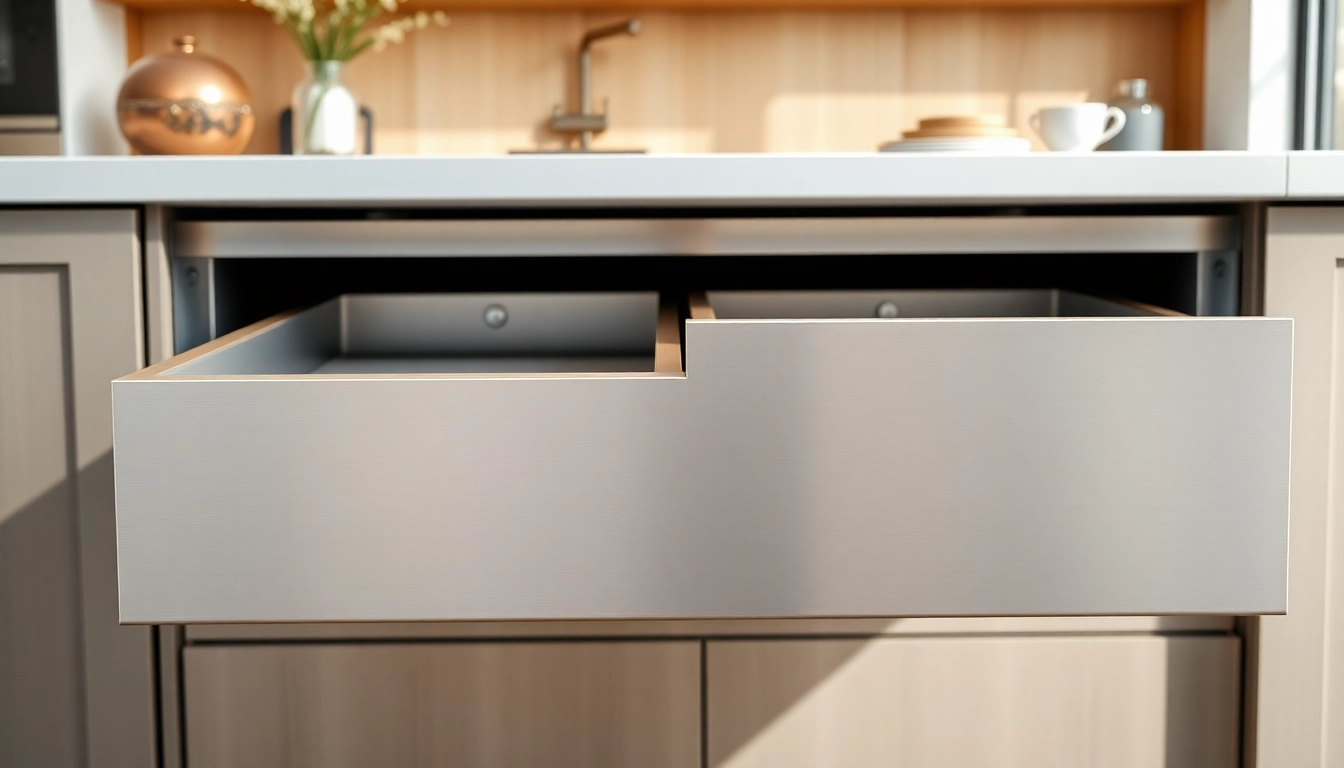
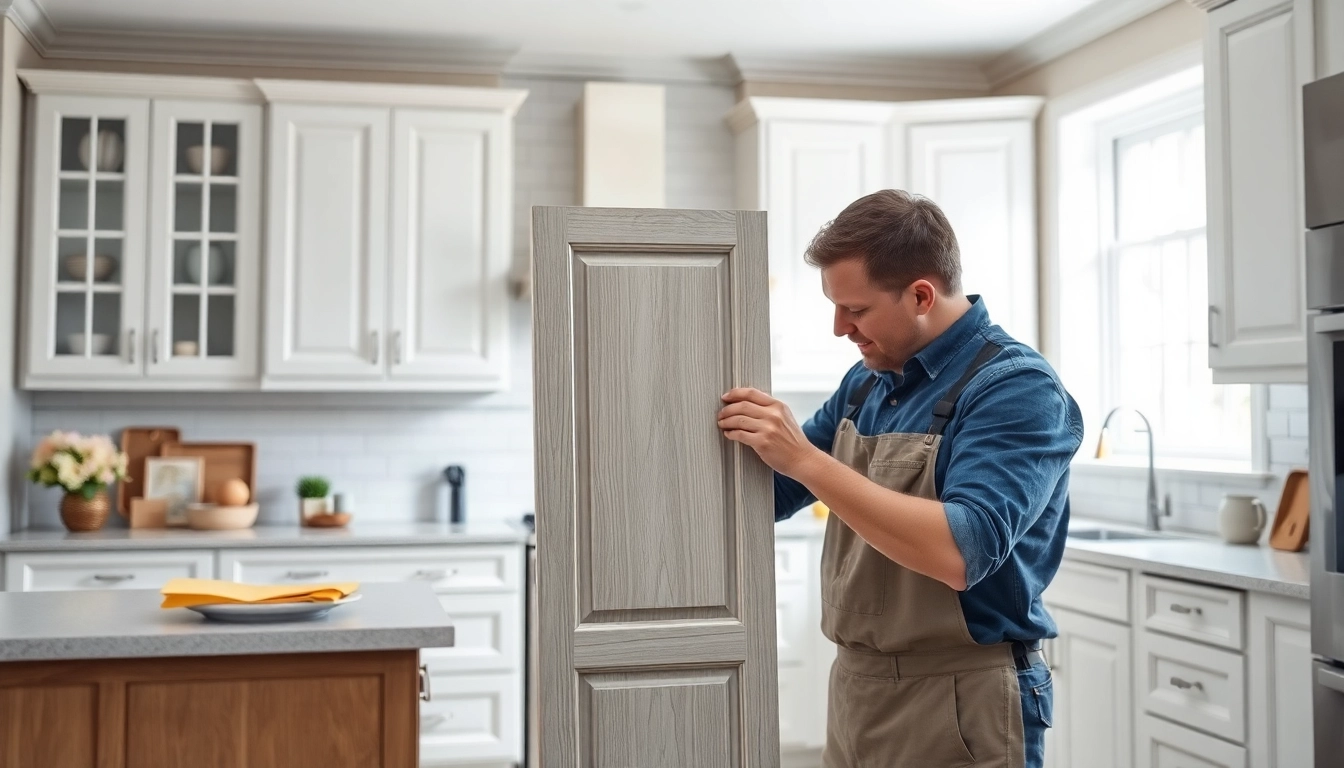
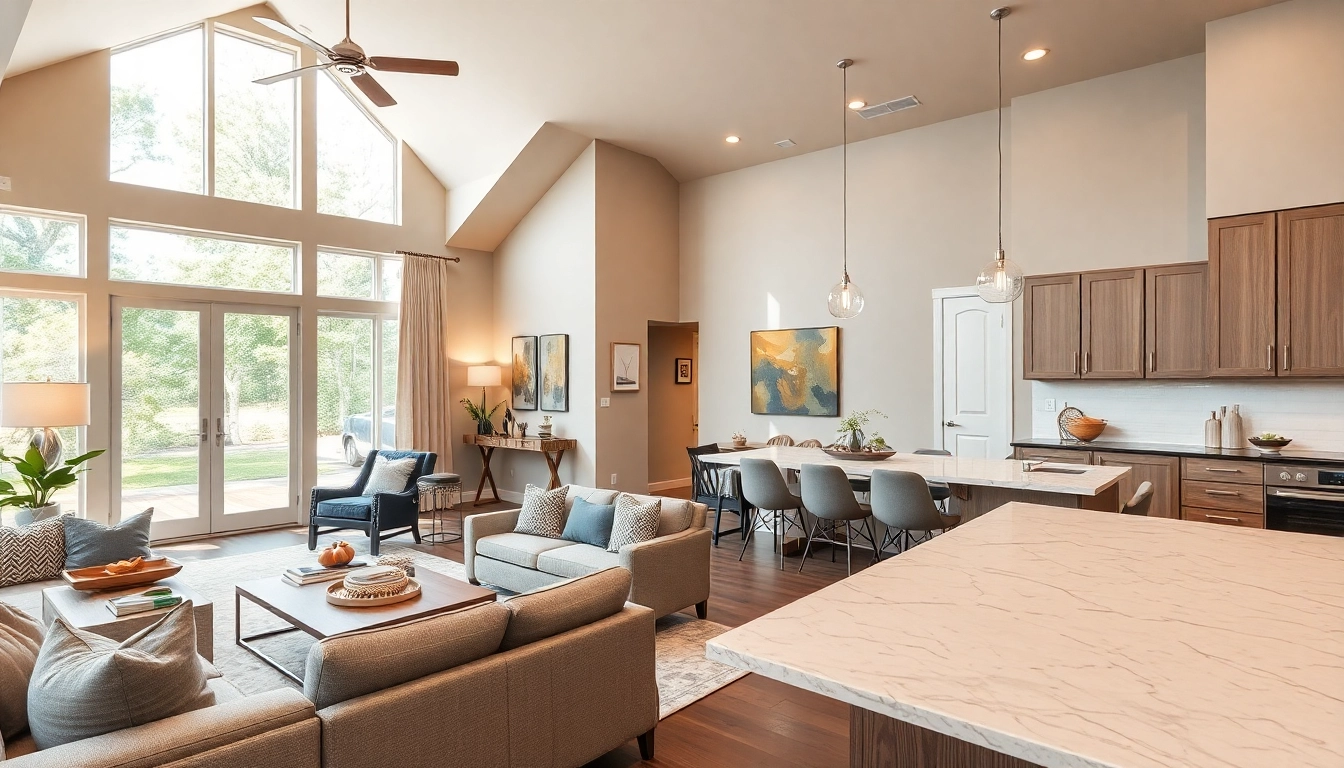
  • The Kitchen: Often termed the heart of the home, renovations here can enhance functionality and aesthetics.
  • Bathrooms: Updating plumbing fixtures or layout can vastly improve usability and appeal.
  • Flooring: Restoring original wood floors or upgrading to modern, sustainable options can add value.
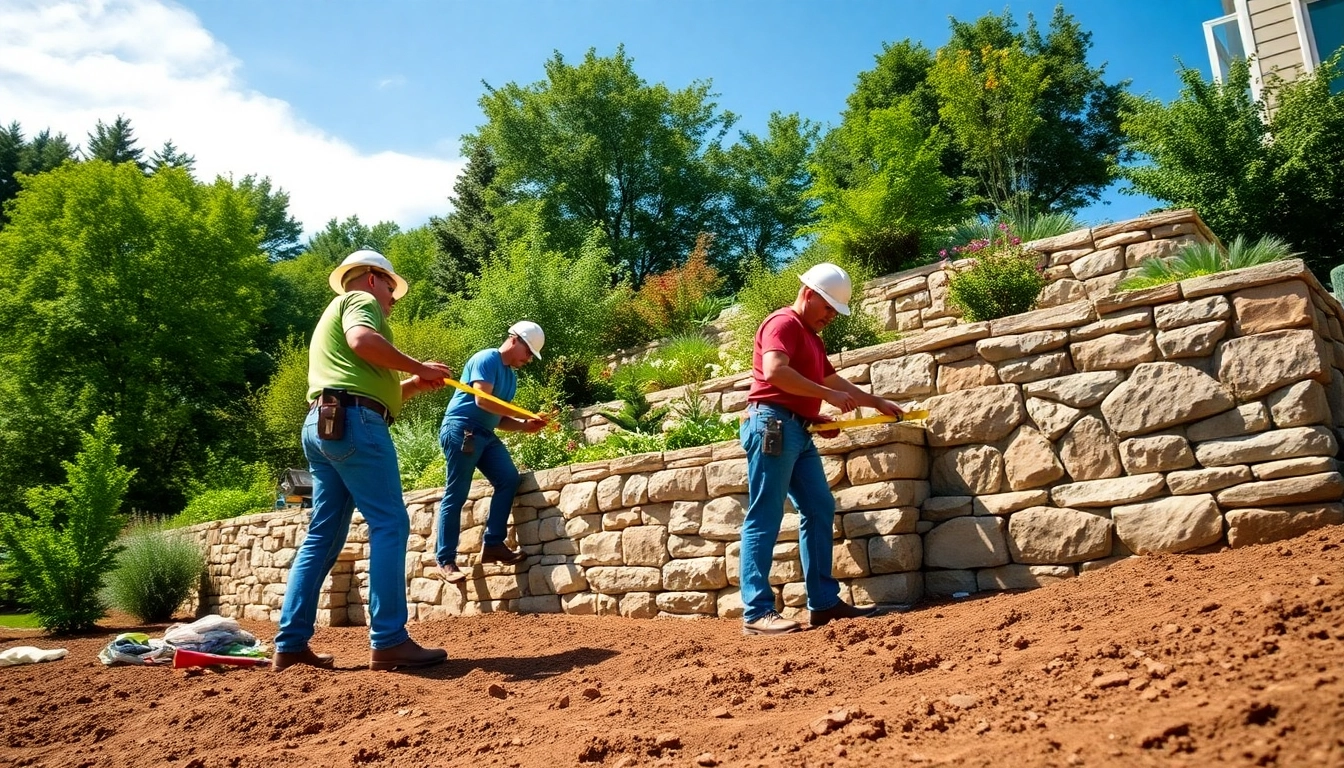
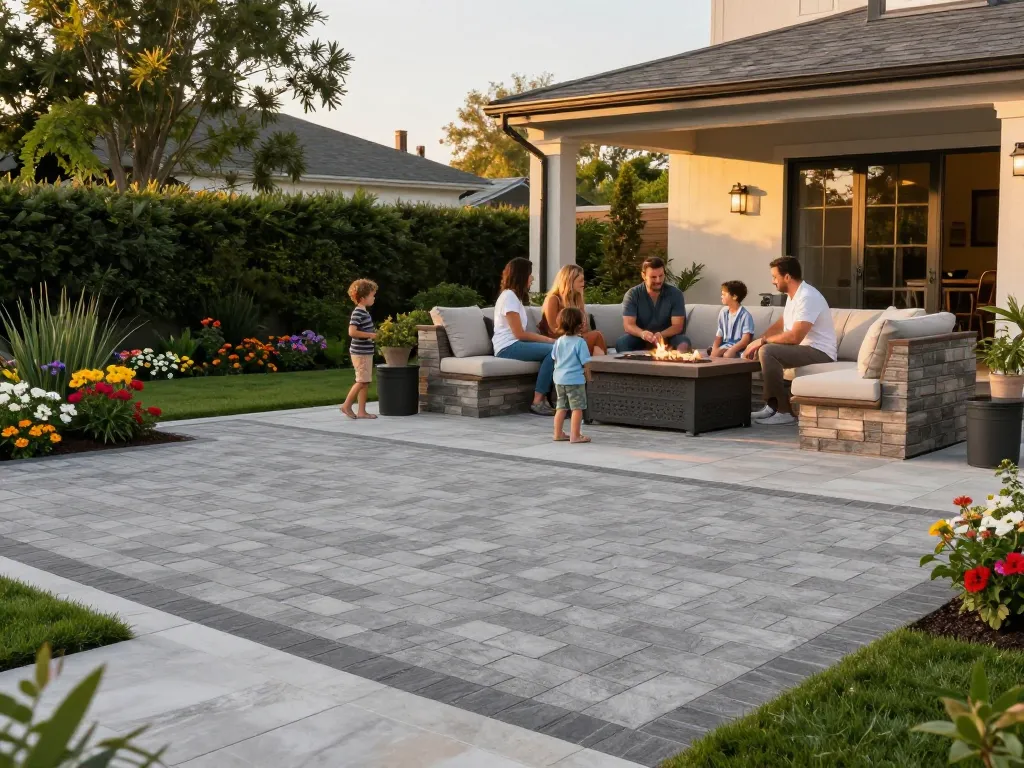
  • Exterior Facade: Addressing issues with the siding, roof, or windows can prevent long-term damage.

Setting a Realistic Budget

A well-defined budget is critical for a successful renovation. Here are some steps:

  1. Estimate Costs: Break down costs by materials, labor, and permits.
  2. Prioritize Expenses: Identify must-have upgrades versus wish-list enhancements.
  3. Include Contingency: Allocate an extra 10-15% for unexpected expenses.

Creating a Timeline for Your Project

Establishing a timeline will help to manage expectations and resources:

  • Set a realistic start and end date based on the scope of work.
  • Coordinate with contractors and suppliers to align timelines effectively.
  • Incorporate buffers for permitting and inspections which can often be time-consuming.

Design Trends for Colonial Home Renovation

Modern Versus Traditional Aesthetics

The balance between preserving traditional elements and incorporating modern design is crucial. Consider:

  • Open Floor Plans: While colonial homes originally had closed spaces, opening up kitchens and living areas can create a more modern feel.
  • Mixing Textures: Combining traditional wood with contemporary materials like steel or glass creates striking contrasts.
  • Functional Spaces: Adapt areas for modern uses, like home offices or multi-functional spaces.

Incorporating Energy Efficiency

Energy efficiency is a major consideration for modern renovations. Strategies include:

  • Upgrading Insulation: Proper insulation not only reduces energy costs but also improves comfort.
  • Energy-Efficient Windows: Installing double or triple-glazed windows maintains the aesthetic while improving efficiency.
  • Smart Home Technology: Implementing smart thermostats and lighting can enhance energy management.

Color Schemes That Enhance Historical Attributes

Selecting an appropriate color palette can accentuate a colonial home’s features:

  • Earth Tones: Warm, natural colors provide a timeless feel.
  • Historical Shades: Researching period-appropriate colors can help maintain historical accuracy.
  • Accent Colors: Use bold colors sparingly to highlight architectural features like moldings or doorways.

Choosing the Right Materials for Colonial Home Renovation

Traditional Materials for Authenticity

Preserving the integrity of the home often means using traditional materials. Some recommendations include:

  • Wood: Opt for reclaimed wood for flooring and beams to maintain the character.
  • Brick and Stone: These can be integral to the facade, offering durability and historical accuracy.

Modern Alternatives That Blend Well

When traditional materials aren’t feasible, consider modern alternatives that harmoniously integrate:

  • Composite Materials: These can mimic wood and stone without the maintenance burdens.
  • Eco-Friendly Options: Sustainable choices such as bamboo flooring can enhance both aesthetics and environmental friendliness.

Balancing Durability and Aesthetics

When selecting materials, balance is key:

  • Longevity: Materials must withstand time and wear.
  • Maintenance: Choose items that retain beauty with minimal upkeep.
  • Compatibility: Ensure that modern materials complement the home’s historical elements.

Frequently Asked Questions About Colonial Home Renovation

What are the most common mistakes in colonial home renovation?

Common mistakes include overlooking structural issues, not respecting historical accuracy, and poor budget planning, leading to rushed and subpar renovations.

How long does a typical colonial home renovation take?

The duration varies based on the project’s scope, but major renovations can take anywhere from a few months to over a year, especially if historical elements need preservation.

Which permits might I need for renovations?

Renovations often require permits for structural changes, electrical updates, and plumbing work. Check local regulations to ensure compliance and avoid fines.

What are cost-effective upgrades for colonial homes?

Cost-effective upgrades include repainting, landscaping, and kitchen or bathroom fixture replacements, which can significantly enhance appeal without major renovations.

Can I maintain historical accuracy while renovating?

Yes, it’s crucial to conduct research to ensure that updated elements respect the original architecture, including materials, styles, and colors consistent with the era.

Showcase the functionality of a Double Wall Drawer System in a stylish kitchen environment.

Enhancing Your Space with the Double Wall Drawer System

Introduction to Double Wall Drawer System

In the quest for efficient storage solutions in modern living spaces, the Double Wall Drawer System has emerged as a game-changer. This innovative design not only enhances the aesthetic appeal of cabinetry but also maximizes functionality. By understanding the intricacies of this system, homeowners and designers alike can appreciate its design, benefits, and versatility.

Understanding the Design and Functionality

The Double Wall Drawer System consists of two layers or walls, typically made from high-quality materials like metal or engineered wood. This construction provides superior strength and durability compared to traditional single-wall drawers. The dual-wall design creates a more substantial feeling, ensuring that the drawer can handle heavier loads without bending or warping over time. Additionally, the design allows for smoother sliding mechanisms, which translates to ease of use.

Benefits of a Double Wall Drawer System

There are numerous benefits associated with the Double Wall Drawer System that make it an attractive choice for both new constructions and remodels. Here are some of the most noteworthy advantages:

  • Enhanced Durability: The robust construction minimizes the risk of damage even under heavy use.
  • Improved Aesthetics: Sleek designs can increase the visual appeal of furniture.
  • Better Functionality: Efficient space utilization and smoother slides enhance user experience.
  • Customization: Available in various styles and finishes to match diverse décor themes.

Common Applications in Modern Homes

The versatility of the Double Wall Drawer System allows it to fit seamlessly into various environments. Below are common applications:

  • Kitchens: Ideal for storing utensils, pots, and pans in a space-efficient manner.
  • Bathrooms: Provides convenient storage for toiletries and towels.
  • Home Offices: Perfect for organizing documents and office supplies.
  • Living Rooms: An elegant solution for holding books, remote controls, and decor items.

Why Choose a Double Wall Drawer System?

Choosing a Double Wall Drawer System over traditional drawer designs can provide a host of advantages that ultimately make it a wise investment.

Superior Durability and Strength

One of the most significant advantages of a Double Wall Drawer System is its strength. The dual-layer construction not only supports more significant weight but also extends the lifespan of the drawer. Unlike traditional drawers which may sag or break under pressure, these robust systems are engineered to perform under heavy-duty conditions, significantly reducing maintenance costs.

Maximizing Storage Efficiency

The innovative design of the Double Wall Drawer System allows for more efficient use of space. Its configuration can accommodate dividers or compartments, enabling better organization of items, thus increasing the overall storage capacity without expanding the footprint of the cabinetry. This is particularly beneficial in smaller spaces where maximizing every inch counts.

Ease of Use and Maintenance

The Double Wall Drawer System prioritizes user experience, featuring smooth gliding mechanisms that facilitate easy opening and closing. Maintenance is also straightforward: a simple wipe down is usually sufficient to keep the system clean. Since the materials used are often resistant to wear and tear, the need for repair is significantly reduced, thus enhancing long-term satisfaction with the product.

Installation Guidelines for Double Wall Drawer System

Installing a Double Wall Drawer System may seem daunting, but with the right tools and a structured approach, it can be an achievable DIY project.

Tools and Materials Needed

Preparation is key to a successful installation. Here’s a list of tools and materials you will need:

  • Drill and drill bits
  • Screwdriver
  • Level
  • Tape measure
  • Wood screws
  • Drawer slides (ensure they are compatible with your double wall drawer system)
  • Pencil
  • Safety goggles

Step-by-Step Installation Process

Follow this step-by-step guide for a seamless installation:

  1. Measure the Space: Use a tape measure to ascertain the correct dimensions for your drawer space.
  2. Mark Drill Points: Based on your measurements, mark where screws will go on your cabinetry.
  3. Install Drawer Slides: Secure the slides onto the side of the cabinet using the drill and screws.
  4. Attach the Drawer Face: Follow manufacturer instructions for securing the face to the drawer body.
  5. Insert the Drawer: Slide the drawer into place, ensuring it fits at the desired height and location.
  6. Level the Drawer: Check with a level to make sure your drawer is straight, making any adjustments as necessary.

Common Installation Mistakes to Avoid

While installing a Double Wall Drawer System is feasible, several common pitfalls can derail the process:

  • Incorrect Measurements: Always double-check your measurements before cutting or drilling.
  • Neglecting Leveling: Failing to level the drawer can lead to uneven openings.
  • Using Wrong Hardware: Ensure that you use compatible screws and drawer slides to avoid structural issues.
  • Skipping the Test Run: Always test the drawer’s operation before completing the installation to make any necessary adjustments.

Comparative Analysis: Double Wall Drawer System vs. Traditional Drawers

Understanding the differences between a Double Wall Drawer System and traditional drawers can significantly influence your choice.

Design Flexibility and Customization

A standout feature of the Double Wall Drawer System is its design flexibility. Many systems offer a range of customizable options, from sizes to finishes, allowing homeowners to create a cohesive look throughout their space. In contrast, traditional drawers often come in fixed dimensions and fewer design options.

Cost-Effectiveness in the Long Run

While the initial investment for a Double Wall Drawer System may be higher, its durability translates to lower long-term costs. Traditional drawers may require more frequent repairs or replacements, making the initial cost savings misleading. In essence, the Double Wall Drawer System ensures that your investment pays off over time.

Maintenance and Repair Considerations

Maintenance for a Double Wall Drawer System is typically less cumbersome compared to traditional drawers. The higher quality materials used in their construction require minimal upkeep and provide outstanding longevity. Traditional drawers, conversely, may need regular tightening of screws and adjustments to maintain functionality.

FAQs about Double Wall Drawer System

1. What is a Double Wall Drawer System?

A Double Wall Drawer System features a robust design with two layers of material for enhanced durability and smooth operation.

2. How do I install a Double Wall Drawer System?

Follow manufacturer guidelines for installation, ensuring you have the right tools and measurements for a seamless fit.

3. Are Double Wall Drawer Systems easy to maintain?

Yes, these systems typically require minimal upkeep, just occasional cleaning and checking for alignment.

4. Can I customize my Double Wall Drawer System?

Absolutely! Many systems offer customization options for sizes, finishes, and configurations to fit your needs.

5. Where can I use Double Wall Drawer Systems?

These systems are ideal for kitchens, bathrooms, offices, and any space requiring efficient storage solutions.

Inspecting roofing solutions in South Jersey for durability and quality assurance.

Quality Roofing Solutions for Homeowners in South Jersey

Understanding Roofing Options Available in South Jersey

Different Types of Roofing Materials

The roofing options available in South jersey can be vast, and choosing the right type is crucial for durability and aesthetics. Here are some of the most common roofing materials used in the region:

  • Asphalt Shingles: This is one of the most popular choices for homeowners due to its affordability and ease of installation. Asphalt shingles come in a variety of colors and styles, making them versatile for many different architectural designs.
  • Metal Roofing: Known for its durability, metal roofing can last over 50 years and withstand extreme weather conditions, making it a wise investment. Additionally, it’s energy-efficient, reflecting sunlight and lowering cooling costs during hot summers.
  • Wood Shingles: Offering a natural aesthetic, wood shingles provide excellent insulation. However, they require more maintenance and may not be suitable for areas prone to wildfires.
  • Slate and Tile: Although these are more expensive options, they provide exceptional longevity and can elevate the curb appeal of any home. They are particularly appealing in homes aiming for a historic or luxurious feel.
  • Rubber Roofing: Popular for flat roofs, rubber roofing is affordable and provides excellent waterproofing. Its sustainability also appeals to environmentally conscious homeowners.

Benefits of Reliable Roofing Choices

Opting for reliable roofing materials in South jersey provides numerous benefits:

  • Durability: Quality roofing can withstand the region’s weather extremes, reducing the need for frequent repairs or replacements.
  • Energy Efficiency: Proper insulation and roofing materials can significantly lower heating and cooling bills by maintaining temperature control within the home.
  • Aesthetic Appeal: A well-selected roofing material enhances the visual appeal of a home, which can increase property value.
  • Safety: Quality roofing protects against potential leakages and structural damage caused by storms and other environmental factors.

Seasonal Considerations for Roofing in South Jersey

Seasonal weather changes in South jersey necessitate careful consideration when it comes to roofing:

  • Winter: Snow can accumulate on roofs, especially flat or low-pitched designs, leading to potential collapse if too much weight builds up. Regularly clearing snow is essential.
  • Spring: The spring season often brings heavy rains. Ensure gutters and downspouts are clear to prevent water damage.
  • Summer: High temperatures can impact the thermal expansion of roofing materials. Selecting heat-reflective materials can mitigate heat absorption.
  • Fall: As leaves fall, they can cause blockages in gutters and valleys. Regular maintenance is critical to prevent mold or rot.

Choosing the Right Contractor for Your South Jersey Home

Key Qualities to Look For

With the importance of a quality roof, choosing the right contractor in South jersey is paramount. When searching for a roofing contractor, consider the following qualities:

  • Experience: Look for contractors with a proven track record in roofing projects, particularly in your local area.
  • Reputation: Check online reviews and get referrals from neighbors to gauge the contractor’s reliability and workmanship.
  • Licensing and Insurance: Ensure the contractor is licensed to operate in South jersey and carries sufficient insurance to protect you from liability.
  • Transparency: A good contractor should provide clear pricing, timelines, and a detailed contract before starting any work.

Questions to Ask Potential Contractors

When interviewing potential roofing contractors, consider asking the following questions:

  • What experience do you have with roofing projects similar to mine?
  • Can you provide references from previous clients?
  • What materials do you recommend and why?
  • How long will the roofing project take from start to finish?
  • What warranties do you offer on materials and workmanship?

How to Verify Contractor Credentials

Before hiring a contractor, it’s imperative to verify their credentials. This can be done by:

  • Checking Licensing: Ensure the contractor holds a valid license in South jersey by visiting local government websites.
  • Insurance Verification: Request proof of insurance and ensure it covers liability and workers’ compensation.
  • Reviewing References: Speak to past customers about their experiences, specifically regarding quality and timeliness.
  • Researching Complaints: Check with the Better Business Bureau for any complaints regarding the contractor.

Maintaining Your Roof: Best Practices in South Jersey

Regular Inspection Tips for Homeowners

Regular inspections are vital for the longevity of your roof. Here are tips for effective roof inspections:

  • Frequency: Inspect your roof at least twice a year, preferably in spring and fall, and after any severe weather.
  • Look for Damage: Check for missing or cracked shingles, signs of leakage, rust on metal roofs, and loose flashing.
  • Gutter Maintenance: Clear debris from gutters regularly to ensure proper drainage.
  • Hire Professionals: For high or complex roofs, consider hiring a qualified professional for thorough inspections.

Common Problems & Solutions

Homeowners often encounter several roofing problems. Here are some common issues and their solutions:

  • Leaking Roof: Check for damaged shingles or underlayment. Repair or replace them as necessary.
  • Pooling Water: Ensure your roof has the right slopes for drainage, and clean out debris from valleys and gutters.
  • Granule Loss: This indicates wear; check if you need to replace the shingles, especially in asphalt roofs.
  • Moss and Algae Growth: Clear these growths regularly, as they can retain moisture and damage your roof.

Seasonal Maintenance Checklists

Seasonal maintenance is essential to preserving your roof. Consider these checklists for each season:

  • Spring:
    • Inspect for winter damage.
    • Clean gutters and downspouts.
    • Trim overhanging tree branches.
  • Summer:
    • Inspect for damage from heat.
    • Check attic ventilation and insulation.
    • Freshen up roof materials if necessary.
  • Fall:
    • Clear out gutters and valleys.
    • Inspect for any new wear or tear.
    • Perform a thorough inspection before winter.
  • Winter:
    • Keep an eye on snow accumulation.
    • Ensure attic insulation is adequate.
    • Inspect for ice dams and remove them safely.

Understanding Roofing Estimates and Budgeting

Factors Influencing Roofing Costs

When budgeting for roofing projects in South jersey, consider these factors:

  • Material Choice: Different materials come with varying costs. Asphalt shingles are generally the most affordable, while slate and tile are more expensive.
  • Roof Size and Complexity: Larger or more complex roofs will naturally take more time and materials to complete.
  • Labor Costs: The experience and location of your contractor can affect labor charges.
  • Permits and Insurance: Keep in mind any local regulations that may require permits, contributing to total costs.

How to Create a Roof Budget

Creating a roofing budget can mitigate financial stress. Follow these steps:

  • Evaluate Your Finances: Determine how much you can afford upfront and consider financing options if necessary.
  • Get Multiple Estimates: Seek at least three estimates from qualified contractors to understand the market average for your region.
  • Include Contingency Funds: Allocate an extra 10-20% of your total budget for unforeseen costs that may arise during the project.
  • Plan for Maintenance Costs: Include future maintenance costs in your budget to prolong the lifespan of your roof.

Comparing Quotes from Different Contractors

When comparing quotes, consider the following approaches:

  • Apples to Apples: Ensure that all quotes encompass the same project details, materials, timelines, and warranties for an accurate comparison.
  • Evaluate Included Services: Check what each estimate covers; some may include cleanup, while others may not.
  • Assess the Contract’s Clarity: A clear contract should outline payment details, the scope of work, and timelines. Be wary of vague estimates.
  • Check for Hidden Costs: Some contractors might list lower initial prices but include add-ons. Know what you’re paying for upfront.

FAQs About Roofing in South Jersey

What is the average lifespan of a roof in South Jersey?

Typically, a roof lasts 20-30 years depending on materials and maintenance.

How often should I inspect my roof in South Jersey?

It’s advisable to inspect your roof at least twice a year and after major storms.

Do I need a permit for roofing work in South Jersey?

Yes, most roofing projects in South Jersey require a permit; check with local regulations.

What should I do if my roof has damage?

Contact a qualified roofing contractor immediately to assess and repair any damage.

Are there warranties available for roofing in South Jersey?

Yes, most roofing materials come with warranties; ask your contractor for details.

Plumber performing whole house repiping services St Petersburg FL in a bathroom renovation.

Top Whole House Repiping Services St Petersburg FL for Modern Home Solutions

Understanding Whole House Repiping Services

What is Whole House Repiping?

Whole house repiping is a plumbing service that involves replacing all the existing pipes in a home to ensure efficient water flow, eliminate leaks, and enhance overall water quality. This extensive process may be necessary due to aging infrastructure, deteriorating materials, or changes in local water standards. Homeowners in St. Petersburg can benefit significantly from whole house repiping services St Petersburg FL, which provide them with peace of mind in knowing that their plumbing system is both efficient and reliable.

Signs You Need Repiping

Identifying the need for repiping early can save homeowners both time and money. Common signs that suggest your home may need a repipe include:

  • Frequent Leaks: If you’re experiencing repeated leaks in various areas of your plumbing, it may indicate that your pipes are failing.
  • Reduced Water Pressure: When pipe corrosion occurs, the diameter of the pipes diminishes, resulting in reduced water pressure at faucets and showerheads.
  • Discolored Water: Rusty or brown-colored water often signals that iron pipes are corroding and may soon fail.
  • High Water Bills: An unexpected increase in your water bill could indicate leaks that are often hidden within your walls or foundation.
  • Strange Noises: Gurgling or hissing noises from pipes can suggest air pockets in corroded or damaged pipes.

Benefits of Whole House Repiping Services St Petersburg FL

Opting for whole house repiping comes with numerous advantages, enhancing both functionality and the value of the home. Some of these benefits include:

  • Improved Water Quality: New pipes help reduce contamination, ensuring clean water for drinking and cooking.
  • Increased Home Value: Repiping can significantly raise property value, making it an appealing option for potential buyers.
  • Enhanced Efficiency: Modern pipes significantly improve water flow and pressure, leading to enhanced convenience in daily activities.
  • Reduced Maintenance Costs: Investing in repiping means fewer repairs and maintenance, ultimately saving homeowners money in the long run.
  • Peace of Mind: Knowing that your plumbing system is modern and functional reduces stress and worry about potential plumbing disasters.

Choosing the Right Plumbing Materials

Types of Pipes for Home Repiping

Selecting the appropriate materials for repiping is critical for long-term performance. The most commonly used types of piping include:

  • Copper Pipes: Known for durability and resistance to corroding, copper is a popular choice despite its higher initial cost.
  • PVC Pipes: Lightweight and easy to install, PVC is an economical option suitable for cold water systems.
  • PEX Pipes: Flexible and resistant to temperature changes, PEX is increasingly favored in modern plumbing.
  • C-PVC Pipes: This variant is suitable for hot water applications, providing a robust solution proactive for both plumbing and drainage.

Comparative Analysis of Material Durability

Each type of pipe has its pros and cons regarding durability:

  • Copper: Lasts up to 50 years but can be prone to corrosion in certain water conditions.
  • PVC: Generally lasts around 25 to 40 years but is not suitable for hot water applications.
  • PEX: Offers a lifespan of over 50 years, is resistant to scale buildup, and is less likely to burst in winter conditions.
  • C-PVC: Similar longevity to regular PVC but with added strength for hot water use.

Cost Implications of Various Materials

The cost of repiping can vary significantly based on the materials selected:

  • Copper: $2.00 to $10.00 per linear foot.
  • PVC: Generally cheaper, around $0.50 to $3.00 per linear foot.
  • PEX: Costs between $0.50 to $2.00 per linear foot and becomes increasingly popular due to its flexible installation and affordability.
  • C-PVC: Similar costs to PVC but with slight increases for hot water capabilities.

The Repiping Process Explained

Initial Assessment and Planning

The first step in the repiping process involves assessing the current plumbing system. A professional plumber will conduct an evaluation, looking for signs of damage or deterioration in existing pipes. Based on the assessment, a comprehensive plan is devised, outlining which areas need replacement and the materials to be used.

Step-by-Step Installation Methodology

The installation of new pipes typically follows these steps:

  1. Shut off the water supply: Ensures safety during the repiping process.
  2. Remove old pipes: Careful removal of damaged pipes to prepare for new installations.
  3. Install new piping: Following the planned layout, new pipes are installed in place of the old.
  4. Reconnect plumbing fixtures: All appliances and fixtures are reconnected to the new plumbing system.
  5. Tests and inspections: The plumber conducts tests to check for leaks and ensure proper functionality.

Post-Installation Quality Checks

After the installation, quality checks are performed. This includes inspecting for leaks, confirming satisfactory water pressure, and ensuring that all appliances are functioning correctly. A responsible plumbing service will also provide recommendations for ongoing maintenance to prolong the life of the new plumbing system.

Impact on Home Value and Insurance

How Repiping Affects Home Value

Undergoing repiping can significantly increase a property’s value. Prospective buyers often see repiping as a major advantage, knowing they won’t have to deal with plumbing issues for years. Homes with modern plumbing systems are viewed as more reliable and may attract higher offers in the real estate market.

Insurance Considerations for Repiped Homes

Repiping can create savings on homeowners’ insurance. Insurance companies might offer lower premiums for homes with updated plumbing systems. Additionally, a professional repiping job can ensure compliance with local codes, providing further assurance to insurers regarding risks of leaks and subsequent water damage.

Long-Term Maintenance Benefits

Investing in a repipe can lead to extensive long-term benefits. New piping minimizes the need for frequent repairs, reducing maintenance costs. Upgraded systems also reduce the chances of mold growth associated with leaks, cutting down on potential health risks. New pipes often come with warranties, providing further financial security to homeowners.

FAQs on Whole House Repiping

What is the typical cost of whole house repiping?

The cost for whole house repiping varies based on material type and home size, typically ranging from $4,000 to $15,000.

How long does a repiping project usually take?

The timeframe for a repiping project can range from one to three days, depending on the home’s complexity and size.

Will repiping disrupt my daily routine?

Repiping may cause temporary inconveniences, such as limited water access, but most disruptions are minimal and managed by the plumbing team.

Can I stay in my home during repiping?

In many cases, homeowners can remain in their homes during repiping, although it’s advised to plan around any necessary water shut-offs.

How often should I consider repiping my home?

It’s recommended to evaluate your plumbing’s condition every 25 to 50 years, depending on the materials used and signs of deterioration.

Retaining wall contractor Bay Area building a stone wall in a landscaped backyard.

Top Tips for Hiring a Retaining Wall Contractor Bay Area

Understanding Retaining Walls

What are Retaining Walls?

Retaining walls are structural barriers designed to hold back soil and prevent erosion, especially in areas with steep landscapes. They are crucial for creating level spaces in yards and gardens, preventing landslides, and managing water runoff. Typically made from materials like concrete, stone, wood, or brick, retaining walls can vary significantly in height, thickness, and design to suit different purposes and aesthetics. A well-built retaining wall not only serves its functional purpose but can also enhance the visual appeal of your property.

Why Retaining Wall Contractor Bay Area is Essential

Constructing a retaining wall requires expertise, precise planning, and compliance with local regulations. That’s where a retaining wall contractor Bay Area comes into play. These professionals possess the skills necessary to assess your site’s specific needs and ensure your wall is structurally sound and visually appealing. They understand the specific soil types, weather conditions, and potential drainage issues in the Bay Area, which can significantly impact the durability and effectiveness of the retaining wall.

Types of Retaining Walls and Their Uses

Retaining walls come in various types, each suited for different applications:

  • Gravity Walls: These rely on their own weight to hold back soil, suitable for short walls.
  • Anchor Walls: These use cables or other materials anchored into the ground for additional support, ideal for taller walls.
  • Sheet Piling Walls: Made from materials such as steel or vinyl, often used in tight spaces where minimal disturbance is desired.
  • Crib Walls: Constructed from interlocking timbers or concrete, offering a slatted design that allows for drainage.
  • Segmental Retaining Walls: Composed of large blocks that stack without mortar, these walls are highly versatile and popular for residential landscaping.

Choosing the Right Contractor

Qualities of a Reliable Retaining Wall Contractor Bay Area

Selecting the right retaining wall contractor is crucial for the project’s success. A reliable contractor should possess the following qualities:

  • Experience: Look for a contractor with a proven track record in building retaining walls similar to your project.
  • Licensing and Insurance: Ensure the contractor is licensed and carries insurance to protect against potential accidents.
  • Clear Communication: A good contractor should communicate clearly about timelines, costs, and project expectations.
  • Portfolio of Past Work: Ask to see previous projects to gauge the contractor’s style and quality.
  • Customer Reviews: Look up testimonials and reviews from past clients to evaluate their satisfaction with the contractor’s work.

Questions to Ask Potential Contractors

When interviewing potential contractors, consider asking these critical questions:

  • What is your experience in building retaining walls of this type and size?
  • Can you provide references from past clients?
  • What materials do you recommend for my specific project?
  • What is your estimated timeline for completion?
  • Do you offer any warranty or guarantee for your work?

Checking References and Past Work

Before making a decision, it is wise to verify the contractor’s previous work and customer satisfaction. Reviewing references not only gives insight into the contractor’s quality but also their ability to stay on schedule and budget. Ask for photos of finished projects to assess the quality of workmanship and consider visiting a few to see the structures in person.

Cost Considerations

Factors Influencing Retaining Wall Costs

The cost of a retaining wall project can vary significantly based on several factors, including:

  • Height and Length: Taller and longer walls require more materials and labor, increasing costs.
  • Material Choice: Different materials have varying costs and aesthetic impacts; for instance, natural stone tends to be more expensive than concrete.
  • Site Conditions: If the land is difficult to access or requires extensive preparation, this can boost labor costs.
  • Drainage Needs: Walls that need drainage systems will incur additional expenses.
  • Design Complexity: Unique designs or patterns may necessitate additional labor and material costs.

Budgeting for Your Project

Establishing a budget before starting your project is essential. First, gather estimates from at least three contractors to get a reasonable idea of the market price. Include a contingency fund for unexpected expenses, which can amount to around 10-15% of the total cost. It’s also wise to prioritize features that offer the most value, such as durability and aesthetics, to ensure your investment pays off in the long run.

Comparing Quotes from Different Contractors

When comparing quotes, don’t just look at the total price; consider what each estimate includes. One contractor may offer a lower upfront cost but skimp on quality materials or essential services. Review each detail carefully, including the materials used, project timeline, and warranties provided. Ensure you are making an apples-to-apples comparison to find the best overall value.

Installation Process

The Steps Involved in Building a Retaining Wall

The installation of a retaining wall involves several key steps:

  1. Site Inspection: The contractor will examine the area, evaluating soil types and existing landscaping.
  2. Design Planning: A design plan will be created based on your preferences and site conditions.
  3. Excavation: The area for the wall will be excavated to create a stable base.
  4. Base Preparation: A solid foundation, typically gravel or concrete, will be laid to ensure stability.
  5. Wall Construction: Retaining wall blocks or materials are assembled according to the design.
  6. Drainage Installation: A drainage system is often installed to manage water runoff behind the wall.
  7. Backfill and Finish: The area behind the wall is backfilled, and any finishing touches, such as landscaping, are applied.

What to Expect During Installation

During installation, there may be noise and disruption as construction equipment is used, and some landscaping may be temporarily disturbed. It’s essential to discuss the schedule with your contractor to understand when heavy work will take place. Although the process can take several days to weeks, depending on the wall’s size and complexity, a professional contractor will keep you updated on progress.

Safety Measures taken by Retaining Wall Contractors

Safety is paramount during the installation of retaining walls. Contractors adhere to strict safety protocols, including:

  • Using appropriate personal protective equipment (PPE) for all laborers.
  • Ensuring that excavation areas are properly marked to prevent accidents.
  • Implementing proper lifting techniques to avoid injury while handling heavy materials.
  • Following local regulations and guidelines regarding construction safety.

Maintenance and Longevity

How to Maintain Your Retaining Wall

Maintaining your retaining wall is essential for its longevity. Regular inspections for signs of wear and damage will help catch potential issues early. Key maintenance tasks include:

  • Vegetation Management: Ensure no large plants or trees are growing too close to the wall to avoid root damage.
  • Drainage Maintenance: Keep drainage outlets clear to prevent water build-up that can weaken the wall.
  • Surface Cleaning: Remove debris and moss from the wall’s surface, particularly in shaded areas where moisture can linger.

Signs of Wear and Damage

Look out for these indicators that your retaining wall may need repairs:

  • Crumbling or cracked masonry that compromises the wall’s integrity.
  • Bulging or leaning walls, indicating soil pressure issues.
  • Pools of standing water at the wall’s base, signaling drainage failure.
  • Visible separation between the wall and adjacent structures or landscape.

When to Call a Retaining Wall Contractor Bay Area for Repairs

If you notice any of the signs of wear or damage, it’s essential to contact a retaining wall contractor Bay Area for an assessment. Delaying repairs can lead to more extensive damage and costly solutions. An experienced contractor can provide an accurate evaluation and recommend the necessary repairs to restore the wall’s strength and functionality.

Frequently Asked Questions

What is the lifespan of a retaining wall?

The lifespan of a retaining wall varies by materials and environmental conditions, typically ranging from 20 to 100 years. Regular maintenance can extend its longevity.

Can I build a retaining wall myself?

Building a retaining wall requires specific skills and understanding local regulations. While small projects may be feasible, it’s often best to hire professionals for larger walls.

Are permits required for retaining walls?

Yes, many areas require building permits for retaining walls, particularly those over a certain height. Check with local authorities before construction.

How much does a retaining wall cost per foot?

Costs can vary based on materials and design, typically ranging from $15 to $50 per foot. It’s best to get quotes from contractors for accurate pricing.

What type of retaining wall is best for a residential property?

Segmental retaining walls are often recommended for residential properties due to their cost-effectiveness, ease of installation, and aesthetics.

Cabinet Refacing Largo FL project showcasing a craftsman enhancing kitchen cabinetry.

Enhance Your Kitchen with Cabinet Refacing Largo FL

Understanding Cabinet Refacing Largo FL

What is Cabinet Refacing?

Cabinet refacing is an innovative solution for homeowners looking to upgrade their kitchen or bathroom without the need for a full remodel. This process involves replacing the visible parts of your cabinetry—specifically the cabinet doors, drawer fronts, and the exterior veneer—while retaining the existing cabinet boxes. By using new materials and finishes, you can achieve a fresh, updated look for your space.

Essentially, cabinet refacing gives your existing cabinets a makeover, allowing for a revitalization of your kitchen or bathroom at a fraction of the cost and time associated with a complete replacement. For those considering Cabinet Refacing Largo FL, this method integrates advanced techniques and quality materials that ensure durability and aesthetics.

Benefits of Cabinet Refacing

Cabinet refacing offers several advantages. For one, it can significantly enhance the aesthetic appeal of your interior space, allowing for a modernized look that aligns with contemporary design trends. Additionally, refacing is typically quicker than full cabinet replacement, with most projects completing within a week.

Cost efficiency is another critical factor; cabinet refacing can save homeowners up to 50% compared to a complete cabinet overhaul. Further, this method minimizes the environmental impact of renovation by reusing the existing cabinet structures, contributing to sustainability efforts. Refacing also allows for flexibility in style; with the right finishes and hardware, you can create a custom look tailored to your preferences.

When to Choose Refacing Over Replacement

Determining when to refacing versus replacing entirely depends on various factors including cabinet condition, functional requirements, and budget. If the existing cabinets are structurally sound—meaning the frames are intact and the doors function well—refacing can be a smart choice. However, if there are issues with alignment, deep damage, or insects, replacement might be necessary.

Refacing is ideal for situations where homeowners desire a style change without the complexities of redesigning their kitchen layout. If you’re simply looking to freshen the appearance rather than overhaul function (like adding more storage), refacing is the way to go.

Choosing the Right Materials

Best Wood Options for Refacing

The wood selection plays a vital role in the overall look and durability of refaced cabinets. Popular choices include oak, maple, cherry, and birch. Oak is known for its strength and unique grain patterns, making it a long-lasting option. Maple provides a smooth finish that works well for contemporary designs, while cherry adds richness and depth for a more traditional look. Birch is a cost-effective choice providing durability and a versatile base for various finishes.

Consider the desired aesthetic and maintenance level when selecting wood. For instance, while hardwoods are durable, they may require more care than softwoods, which can dent or scratch more easily but offer a lighter look for modern aesthetics.

Choosing Finishes and Colors

Once you’ve chosen the wood type, the next step is selecting finishes and colors that enhance the overall design. You can opt for stained finishes, which accentuate the natural grain of the wood, or painted options that provide a sleek, uniform look. Neutral colors tend to create a timeless look, while bold colors can instill a modern vibe.

Keep in mind the overall color scheme of your kitchen or bathroom when choosing cabinet finishes. Coordination with countertops, flooring, and even appliances can create a seamless and appealing design.

Hardware Selection for Refaced Cabinets

Hardware is the finishing touch in cabinet refacing, and its selection can greatly influence the style of your refurbished cabinets. Depending on your design’s aesthetics, whether minimalist, vintage, or contemporary, you can choose from handles, knobs, and hinges that align with your vision.

Common materials include brass, stainless steel, or matte black finishes. When selecting hardware, consider the functionality and scale; oversized handles can provide a dramatic effect, while smaller knobs lend a subtle touch. It’s essential to ensure that the hardware complements both the color and design of the cabinets for optimal synergy.

DIY vs. Professional Cabinet Refacing

Benefits of Hiring Professionals

While DIY cabinet refacing may appear cost-effective, hiring professionals can often save time and stress. Experienced contractors bring expertise, ensuring the job is done right the first time. They have access to quality materials and tools, plus the know-how to tackle unexpected challenges that may arise during the project.

Professionals can also offer design insights and suggestions based on current trends and functionality, tailoring their services to meet individual needs and preferences. Their knowledge ensures a smooth refacing process and enhances the finished appearance of your cabinets.

Common DIY Mistakes to Avoid

For those inclined toward DIY, there are several pitfalls to navigate. The first common mistake is inadequate measurement; inaccurate sizes can lead to mismatched doors and drawers. Additionally, insufficient surface preparation might lead to peeling finishes down the road.

Another frequent error is neglecting proper alignment during installation. Misaligned doors can result in frustration both visually and functionally. Lastly, failing to research appropriate materials, tools, and techniques can lead to unsatisfactory results, making it essential to plan thoroughly before diving into DIY refacing.

Getting the Right Tools for DIY

If you decide to tackle cabinet refacing on your own, having the right tools is crucial. Necessary tools typically include a power drill, saw, level, measuring tape, and paintbrushes. A finishing sander or orbital sander will also be beneficial for smoothing surfaces.

In addition, make sure you have quality adhesives and clamps to securely attach veneers or panels. Once equipped, take your time to read up on techniques to ensure that your cabinet refacing project results in a professional-quality finish.

Cost Factors in Cabinet Refacing

Average Costs in Largo FL

The average cost of cabinet refacing in Largo FL ranges significantly based on various factors, including kitchen size, materials chosen, and whether professional services are utilized. On average, homeowners may expect to spend between $3,000 to $9,000 for complete refacing, which is substantially less than the cost of full cabinet replacement.

Determining the price requires careful consideration of material choices, additional features like decorative moldings or custom shelving, and labor costs associated if hiring professionals. Always seek multiple quotes to make a well-informed decision.

Understanding Labor Costs

Labor costs can vary based on the complexity of the project and the experience of the contractor chosen. In general, professional labor for cabinet refacing can account for 30-50% of the total project cost. Factors influencing labor rates include the size of the job, ease of access to the cabinetry, and the contractor’s expertise.

Additionally, discussing the scope of work and ensuring that all aspects are included in your quote can prevent any surprises as the project moves forward. Comprehensive planning can help in budgeting effectively.

Budgeting for Unexpected Expenses

When budgeting for cabinet refacing, it’s wise to set aside an extra 10-20% to address unforeseen expenses that may arise. These can include discovering underlying damage, such as water or pest issues, that require repair before refacing can be completed.

Also, costs may fluctuate if you choose to upgrade any additional features or changes during the project. Sticking to a set budget while allowing for flexibility ensures you can successfully achieve your aesthetic goals without financial strain.

Maintenance of Refaced Cabinets

Cleaning and Care Tips

Once your cabinets have been refaced, proper maintenance is key to keeping them looking new. Regular cleaning with a soft cloth and non-abrasive cleaners is recommended to avoid damaging the finishes. Avoid using harsh chemicals that can strip finishes or dull surfaces.

Additionally, be aware of humidity levels; wood can expand and contract with changes in moisture. Maintaining a stable environment will help prolong the life of your refacing work. Regular inspections will also allow for timely adjustments and care.

When to Consider Refinishing

Refinishing should be considered when the surface of the cabinet shows signs of wear such as scratches, dullness, or fading. Refinishing can bring back life to the original surfaces without undergoing a complete refacing process again.

Properly maintaining the cabinets can extend the time between refinishing or refacing, ensuring your investment remains valuable for years to come.

Signs Your Cabinets Need Repairs

Cabinets may show signs of needing repairs through various indicators. Look for issues such as soft spots on the cabinets, warped doors, or persistent creaking sounds during use. Visible damages, such as dents or peeling veneer, also signal it’s time to assess your cabinets.

If you notice any significant issues that compromise the structure or usability of your cabinets, addressing them promptly is crucial to prevent further damage.

FAQs

What is involved in cabinet refacing?

Cabinet refacing includes replacing the cabinet doors, drawer fronts, and veneers while keeping the existing cabinet structure.

How long does cabinet refacing typically take?

Refacing usually takes a few days to a week depending on the kitchen size and complexity of the project.

Is cabinet refacing a good investment?

Yes, refacing can enhance your kitchen’s appearance and increase your home’s value without a complete remodel.

Can I change the layout when refacing?

Cabinet refacing does not typically change layouts; this requires a full remodel. However, it can refresh the existing look significantly.

How do I maintain refaced cabinets?

Regular cleaning with a soft cloth and mild soap helps maintain their appearance. Avoid harsh chemicals.

Cape Cod homes featuring a beautiful expansion and garage in a serene coastal setting.

Stunning Cape Cod Homes: Elegant Designs and Expert Expansions

The Allure of Cape Cod Homes

Historical Significance of Cape Cod Homes

Originating in the early 1600s, cape cod homes are steeped in rich history. These homes were designed by early settlers in New England, reflecting practicality and resilience against coastal elements. Over the centuries, they have evolved but still maintain their fundamental charm, symbolizing the maritime culture of the region. Understanding their historical roots allows modern homeowners to appreciate these structures’ architectural significance.

Key Architectural Features

Cape Cod houses are characterized by their symmetrical design, steeply pitched roofs, and dormer windows. The use of shingles, either wood or asphalt, provides both clarity and authenticity. The facades often display a simple form, with clapboard siding painted in muted hues reflecting the coastal surroundings. Inside, built-in furnishings and open floor plans maximize space and promote a cozy, intimate atmosphere, perfectly aligned with a comfortable coastal lifestyle.

Why Choose Cape Cod Style?

Choosing the Cape Cod style means embracing simplicity, charm, and functionality. These homes are not only aesthetically pleasing but also exceptionally versatile. Their modest design allows for expansion and customization, making them suitable for various family sizes and lifestyle changes. Furthermore, their inherent resilience against the elements and energy efficiency makes them a practical choice for buyers seeking coastal living.

Designing Your Dream Cape Cod Home

Essential Elements for Coastal Living

Designing a Cape Cod home should prioritize open spaces and natural light, essential for coastal living. Large windows not only offer expansive views but also serve to maximize energy efficiency. Materials used should be durable and weather-resistant, considering the coastal climate influences. Additionally, accentuating outdoor areas, such as porches or decks, facilitates a seamless transition between indoor and outdoor spaces, inviting the ocean breeze and natural sunlight into everyday living.

Customization Options and Features

When it comes to customizing your Cape Cod home, options are plentiful. Homeowners often incorporate elements like expanded living rooms, gourmet kitchens, and luxurious bathrooms. Whether it’s an open-concept floor plan or a cozy library nook, the possibilities are endless. Sustainable design practices, like solar panels or green roofing materials, can amplify the home’s environmental friendliness while still embracing traditional aesthetics.

Incorporating Modern Amenities

Integrating modern amenities into a Cape Cod home enhances its functionality while maintaining character. Smart home technologies—including security systems, climate control, and automated lighting—can improve convenience without overtaking the design’s charm. Kitchens can feature state-of-the-art appliances that harmonize with classic design elements, ensuring the home is equipped for contemporary living while retaining its historic appeal.

Expanding Your Cape Cod Home

Benefits of Home Expansion

Expanding a Cape Cod home offers numerous advantages, such as optimizing space for a growing family or adding value to the property. Such expansions can include adding bedrooms, recreational spaces, or even updates to the kitchen. A well-planned expansion projects can blend seamlessly with the existing structure, preserving the home’s initial charm while accommodating modern-day needs.

Design Considerations for Attached Garages

When considering an attached garage, it’s essential to ensure that the design maintains the aesthetic integrity of the Cape Cod style. This includes selecting materials that harmonize with the existing structure, such as matching siding or roofing. Careful planning of the garage’s placement can enhance functionality, allowing for easy access while minimizing disruption of outdoor views. Ventilation and natural light are also key elements to consider, ensuring that the garage complements the home rather than detracts from its beauty.

Common Mistakes to Avoid

One of the most significant errors in home expansion is neglecting to maintain architectural integrity. Homeowners often overlook proportions, leading to designs that appear imbalanced with existing structures. Additionally, using mismatched materials or a poorly planned layout can detract from the home’s value and comfort. It is essential to engage experienced architects or builders who understand the nuances of Cape Cod style to prevent these common pitfalls.

Outdoor Spaces in Cape Cod Homes

Landscaping Ideas for Cape Cod Style

Landscaping for a Cape Cod home should reflect its natural surroundings while enhancing its outdoor aesthetic. Native plants, such as beach grass and ornamental shrubs, can provide beautiful accents and thrive in the coastal climate. Incorporating stone walkways, white picket fences, and outdoor lighting enhances the home’s charm and creates a welcoming atmosphere, inviting outdoor relaxation and family activities.

Creating Inviting Outdoor Living Areas

Creating outdoor living areas that complement a Cape Cod home transforms the property into a true coastal oasis. Decks and patios can be designed with comfortable seating and fire pits for family gatherings. Additionally, integrating outdoor kitchens or dining areas allows for enjoyable summer evenings while showcasing the natural beauty that surrounds the home.

Utilizing Natural Light and Views

Emphasizing natural light in outdoor spaces not only enhances aesthetics but also increases the home’s warmth and energy efficiency. Properly positioning windows and employing glass doors ensure that interiors remain bright and inviting. It’s important to design outdoor spaces that capitalize on views of the ocean or surrounding landscapes, offering serene sights and experiences that enhance everyday life.

Frequently Asked Questions about Cape Cod Homes

What is the typical style of Cape Cod homes?

The typical style of Cape Cod homes features steep roofs, dormer windows, and symmetrical facades with wood siding, embodying simplicity and functionality.

How can I expand my Cape Cod home effectively?

To effectively expand your Cape Cod home, consult with architects who understand the style’s nuances and maintain architectural integrity during the process.

What features increase the value of Cape Cod homes?

Features like modern kitchens, energy-efficient windows, and well-designed outdoor spaces can significantly increase the value of Cape Cod homes.

Are Cape Cod homes suitable for year-round living?

Yes, Cape Cod homes can be equipped for year-round living with proper insulation, heating, and amenities tailored for four-season comfort.

What are some sustainable practices for building Cape Cod homes?

Utilizing locally sourced materials, energy-efficient designs, and installing renewable energy systems ensures sustainable practices in building Cape Cod homes.

Paver driveway near me featuring a stylish outdoor space with a family gathering around a fire pit and landscaped yard.

Professional Paver Driveway Near Me: Building Your Outdoor Legacy in 2026

The Benefits of a Paver Driveway

Choosing the right driveway for your home can significantly affect its appearance and functionality. A paver driveway stands out for its unique combination of durability, aesthetic appeal, and versatility. At Arriaga Pavers, we believe in building legacies through exceptional outdoor spaces. If you’re searching for options, Paver driveway near me provides valuable insights into enhancing your property’s curb appeal.

Why Choose Pavers for Your Driveway?

Paver driveways offer numerous benefits, making them an increasingly popular choice among homeowners. One of the primary reasons for their popularity is their ability to withstand the elements better than traditional asphalt or concrete driveways. Unlike these materials, pavers allow water to drain through joints, which helps prevent puddles and reduces erosion. The flexible design of pavers also means that they are less prone to cracking and shifting, ensuring longevity and lower maintenance costs.

Durability and Aesthetics: A Winning Combination

The durability of pavers is unmatched. Made from concrete, brick, or stone, they are designed to endure heavy loads, making them suitable for both residential and commercial applications. In addition to their strength, paver driveways come in various styles, colors, and textures, allowing homeowners to customize their driveways to perfectly complement their homes. This personalization not only enhances the beauty of your property but also increases its overall value.

Enhancing Property Value with Paver Driveways

Investing in a paver driveway can also significantly enhance the resale value of your home. Real estate experts agree that well-maintained landscapes and driveways can increase home value by up to 15%. Potential buyers often view paver driveways as a luxurious upgrade, setting your property apart in competitive markets. By selecting high-quality pavers and professional installation from trusted contractors like Arriaga Pavers, you can ensure that your driveway not only looks stunning but also stands the test of time.

Choosing the Right Paver Style

With various materials and designs available, selecting the right paver for your driveway can be overwhelming. However, understanding the options available can streamline the decision-making process and help you achieve the desired look for your home.

Exploring Different Paver Materials

Paver driveways can be constructed from several materials, including concrete, clay, and natural stone. Each type has its unique characteristics:

  • Concrete Pavers: These are versatile and come in various shapes and sizes, making them easy to customize. They are also durable and can withstand heavy loads.
  • Brick Pavers: Offering a classic look, brick pavers are beautiful but can be more costly compared to concrete. They also require proper installation to prevent shifting.
  • Natural Stone Pavers: These provide an elegant appearance and are highly durable but can be quite expensive. Natural stone is ideal for creating a high-end aesthetic.

Color and Design Options to Suit Your Home

When selecting pavers, consider your home’s exterior color and style. Pavers are available in a variety of colors, allowing you to create visually appealing contrasts or harmonize with your home’s facade. You can also choose textured finishes for added depth and character.

Custom Patterns and Layouts for Unique Looks

Custom designs can make your driveway a statement piece. From herringbone patterns to circular layouts, the right pattern can enhance curb appeal. Work with Arriaga Pavers to develop a design that complements your home and fulfills your aesthetic desires.

Installation Process: What to Expect

The installation of a paver driveway involves several steps, each crucial for ensuring long-term durability and aesthetic appeal. Here’s an overview of what to expect:

Pre-Installation Planning and Preparation

Before the installation begins, proper planning is essential. This includes measuring the area, selecting the right materials, and preparing the site. A well-planned installation prevents future issues such as drainage problems.

Step-by-Step Installation Guidelines

  1. Site Preparation: Clear the area of existing materials and debris.
  2. Excavation: Dig to the required depth to accommodate the base and pavers.
  3. Base Layer: Install a compacted base of gravel or sand to ensure stability.
  4. Paver Placement: Lay the pavers in your chosen pattern, ensuring they fit snugly together.
  5. Jointing: Fill the joints between the pavers with sand to lock them in place.
  6. Final Inspection: Review the installation for any issues and make necessary adjustments.

Common Pitfalls and How to Avoid Them

One of the most common mistakes during installation is not properly compacting the base material, leading to shifting pavers over time. Ensuring adequate drainage is also essential to prevent water pooling and damage. Hiring experienced contractors like Arriaga Pavers can help mitigate these risks and guarantee a smooth installation process.

Maintenance Tips for Longevity

Proper maintenance can extend the lifespan of your paver driveway and keep it looking new. Here are some tips to help you care for your investment:

Cleaning and Sealing Your Paver Driveway

Regular cleaning is vital to prevent stains and maintain appearance. Use a pressure washer or hose with a mild detergent to remove debris and grime. Additionally, sealing your driveway will protect it from stains and enhance its color, providing an extra layer of durability.

Addressing Repairs and Restoration Needs

Over time, pavers may shift or become damaged. It is essential to address these issues promptly by resetting or replacing damaged pavers. Regular inspections can help identify problems early, saving money on extensive repairs.

Seasonal Care: A Year-Round Approach

In regions affected by freezing temperatures, using de-icing agents can help prevent damage during the winter. In the spring, inspect for cracks or shifts caused by winter weather, and carry out necessary maintenance before the summer heat.

Finding the Best Paver Driveway Services Near You

Finding the right contractor for your paver driveway project is crucial for achieving the best results. Here are some tips on how to research local services effectively.

How to Research Local Contractors Effectively

Start by searching online for reputable contractors in your area specializing in paver installation. Look for companies with a portfolio of completed projects and positive reviews from previous customers.

Evaluating Reviews and Testimonials

Read through reviews on platforms like Google and Yelp to gauge customer satisfaction. Testimonials can provide insights into a contractor’s quality, reliability, and customer service.

Questions to Ask Before Hiring a Contractor

It’s essential to ask potential contractors questions regarding their experience, materials used, warranty offered, and timeline for the project. This information helps you make an informed decision and ensures you choose a contractor who aligns with your vision and expectations.

What are the main advantages of paver driveways?

Paver driveways offer numerous benefits, including enhanced durability, aesthetic appeal, and increased property value. They allow for water drainage, reducing pooling and erosion issues.

How do I choose the right paver for my driveway?

Selecting the right paver involves considering the materials, colors, designs, and patterns that best complement your home’s exterior and meet your durability expectations.

What should I expect during the installation process?

You can expect a systematic process that includes site preparation, base installation, paver placement, and finishing touches, all aimed at ensuring a durable and attractive driveway.

How do I maintain my paver driveway?

Regular cleaning, sealing, and timely repairs are crucial for maintaining the appearance and longevity of your paver driveway.

What’s the best way to find a reliable contractor?

Research local contractors, evaluate their reviews and testimonials, and ask pertinent questions to ensure you choose a reliable and skilled professional for your project.

Austin residential remodeling contractor showcasing a stunning modern interior with natural light and stylish decor elements.

Elevate Your Home with an Expert Austin Residential Remodeling Contractor

Remodeling your home can be a life-changing experience. It provides an opportunity to not only spruce up your living space but also to enhance its functionality, value, and aesthetic appeal. An Austin residential remodeling contractor specializes in transforming homes in diverse ways, bringing both expertise and creativity to the table. Understanding the nuances of residential remodeling and knowing how to collaborate with a contractor can make a substantial difference in achieving your desired outcome. In this guide, we will delve into the various aspects of residential remodeling, providing you with the insights necessary to navigate your project from conception to completion successfully.

Understanding the Role of an Austin Residential Remodeling Contractor

Defining Residential Remodeling

Residential remodeling encompasses a broad spectrum of tasks aimed at improving, updating, or completely transforming a home. This can range from minor cosmetic work such as painting and flooring to extensive renovations that involve structural changes, such as expanding rooms or adding new levels to your property. The primary goal of remodeling is to enhance the functionality, comfort, and visual appeal of your home while adapting to the evolving needs of your family.

The Importance of Hiring Professionals

Hiring an experienced remodeling contractor is crucial for several reasons. Firstly, professionals come equipped with valuable knowledge, technical skills, and access to resources that homeowners typically lack. They understand building codes, permitting processes, and safety regulations, ensuring that your project complies with local laws. Additionally, seasoned contractors have established relationships with suppliers and subcontractors, helping to streamline the procurement of materials and labor. This professionalism translates into time savings and often elevates the quality of the finished project.

Key Services Offered by Contractors

Austin residential remodeling contractors typically offer various services tailored to fit each client’s needs. Some of the most common services include:

  • Home Additions: Expanding your living space by adding new rooms or sections to your home.
  • Kitchen Remodeling: Upgrading appliances, cabinets, countertops, and layout to improve functionality and aesthetics.
  • Bathroom Renovations: Transforming bathrooms with modern fixtures, tiling, and layouts for improved accessibility and enjoyment.
  • Basement Finishing: Converting unfinished basements into livable spaces for recreation, storage, or additional bedrooms.
  • Exterior Remodeling: Enhancements that include siding, roofing, decks, and outdoor living spaces.

Choosing the Right Austin Residential Remodeling Contractor

Researching Local Options

Finding the right contractor begins with thorough research. Start by gathering recommendations from friends, family, and online resources. Websites that specialize in contractor reviews can help you identify local professionals with strong reputations. Make a list of potential contractors in your area and assess their specialties to find one aligned with your project’s scope.

Checking Credentials and Reviews

Before making your choice, verify credentials such as licensing, insurance, and certifications. Ensure that your contractor is legally able to operate within Texas and carries adequate insurance to protect you from liabilities during the remodeling process. In addition, read reviews from past clients to gauge their experiences. Look for patterns in feedback regarding reliability, craftsmanship, and communication, as this will serve as a telling indicator of what you can expect.

Evaluating Portfolios and Past Work

A contractor’s portfolio is a visual testament to their skills and expertise. Request to see project examples that match your intended renovations, and take note of design styles and quality of workmanship. Engaging in discussions about their past projects can provide insights into their approach and capabilities. If possible, visit completed projects to evaluate the final results and speak with homeowners about their experiences.

Planning Your Remodeling Project

Establishing a Budget

Budgets form the backbone of any remodeling project. Start by determining how much you’d like to allocate and factor in costs for materials, labor, permits, and contingencies. An effective budget should include a buffer for unexpected expenses, as they often arise during renovations. Discuss your budget openly with your contractor, who can provide realistic cost estimates and suggest ways to maximize your investment.

Setting a Realistic Timeline

A well-thought-out timeline ensures your remodeling project progresses smoothly. Engage in discussions with your contractor regarding how long specific phases might take. Smaller projects may take weeks, while extensive remodels can last several months. Ensure to factor in wait times for materials, permitting processes, and other variables that could shift your schedule.

Designing Your Dream Space

With a clear budget and timeline in place, begin designing your dream space. Collaborate with your contractor to communicate your preferences regarding aesthetics, layout, and functionality. Utilize mood boards, Pinterest, or design software to articulate your ideas. A skilled contractor will help translate your vision into actionable plans, ensuring they align with structural and practical considerations.

Executing the Remodeling Process

Understanding Project Phases

The remodeling process generally unfolds in several key phases: Design, Demolition, Construction, and Finishing. The design phase involves planning and getting permits, while demolition involves stripping away old elements to make way for new ones. Construction sees the physical transformation of your space according to the plans, and finally, the finishing phase encompasses details like paint, trim, and final touches that elevate your remodeled area.

Maintaining Communication with Your Contractor

Communication stands as a crucial aspect of ensuring a successful remodeling project. Make it a point to establish regular check-ins with your contractor to discuss progress, clarify doubts, and make any necessary adjustments. Sites can shift unexpectedly in terms of design or timelines, and maintaining an open line of communication can alleviate stress periods.

Ensuring Quality and Timeliness

As the project unfolds, it’s important to monitor the quality of work being performed. Schedule site visits to observe activities and confirm that work aligns with your expectations. If issues arise, proactively address them with your contractor. Moreover, ensuring all tasks adhere to the established timeline will facilitate a smooth process and keep the project on track.

Maximizing Value from Your Remodeling Investment

Understanding ROI for Home Improvements

Return on Investment (ROI) is a critical consideration when it comes to home improvements. While not all projects yield the same financial return, certain remodeling choices, such as kitchen and bathroom renovations, can significantly increase your home’s value. Research potential ROI percentages for various projects to inform your decisions effectively.

Tips for Upgrading Key Areas

When looking to maximize value, focus on key areas that buyers prioritize: the kitchen, bathrooms, and curb appeal. Upgrading fixtures, enhancing energy efficiency, and creating open spaces can significantly boost a home’s desirability. Prioritize quality materials and workmanship to further elevate the overall impact of your remodeling project.

Final Touches That Enhance Appeal

After completing major renovations, consider final touches that elevate your newly remodeled space. Decorative elements such as lighting fixtures, paint colors, and landscaping can significantly enhance overall appeal. Accessorizing with items like artwork, furniture, and greenery not only adds character but also fosters a warm environment that feels inviting.

FAQs

What is the typical timeline for a remodeling project?

The timeline varies by project size. Small projects may take a few weeks, while larger ones can span several months. Always discuss timelines with your contractor.

How do I choose the right materials?

Consider durability, aesthetics, and maintenance when selecting materials. Your contractor can provide recommendations based on your budget and style preferences.

Can I live in my home during the remodeling?

It depends on the project’s scope. Minor renovations might allow for continued living, but extensive work may require temporary relocation for safety and comfort.

What permits are needed for remodeling?

Permits depend on your project’s specifics and local regulations. Consult your contractor to ensure all necessary permits are obtained before starting work.

How can I prepare for the remodeling process?

Prepare by decluttering the remodeling area and discussing any concerns with your contractor. Effective communication can streamline the process.

Top 10 Essential Tips for a Beautiful Home and Garden

Understanding Home and Garden Basics

Creating a beautiful and functional home and garden space goes beyond aesthetics; it encompasses understanding the underlying principles that guide design and maintenance. This section will delve into the importance of thoughtful home and garden design, essential terminology, and how to assess your space effectively.

The Importance of Home and Garden Design

Home and garden design plays a crucial role in enhancing the quality of life for the inhabitants. A well-designed space is not merely about visual appeal; it impacts functionality, comfort, and even mental well-being. For example, studies have shown that individuals who spend time in well-planned gardens report lower stress levels and increased feelings of happiness.

Moreover, effective design can significantly increase property value. According to the National Association of Realtors, landscaping can yield a return on investment of up to 100%. A thoughtfully designed garden can create an inviting atmosphere that attracts potential buyers, making it a vital consideration for homeowners.

Common Home and Garden Terminology

Understanding the language of home and garden can empower homeowners to make informed decisions and communicate effectively with professionals. Here are some common terms to know:

  • Hardscaping: Refers to the non-plant elements of landscaping, such as patios, pathways, and retaining walls.
  • Softscaping: Encompasses all the living elements of landscaping, including plants, trees, and soil.
  • Perennials: Plants that live for more than two years, providing garden beauty and stability over time.
  • Annuals: Plants that complete their life cycle in one growing season, often used for seasonal color.

Assessing Your Space: Size, Layout, and Functionality

Before embarking on any home or garden project, assessing your space is essential. Start by measuring the square footage of your home and garden area. Consider the layout and how different zones can be utilized effectively. For example, if you have a small backyard, think about vertical gardening or container gardening to optimize your space.

Additionally, functionality should guide your design choices. Ask yourself:

  • What activities will take place in this space?
  • How can I maximize natural light and airflow?
  • What are the existing features that can be enhanced or incorporated?

Utilizing tools like garden planners and design software can also aid in visualizing your project before execution.

Essential Gardening Techniques for Beginners

For those new to gardening, starting can be daunting. However, with some foundational knowledge, anyone can cultivate a thriving garden. This section covers crucial gardening techniques that every beginner should master.

Selecting the Right Plants for Your Climate

Choosing plants suited to your climate is fundamental for gardening success. Each plant has specific growing conditions, including temperature, sunlight, and moisture requirements. Start by identifying your USDA Plant Hardiness Zone, which indicates the types of plants that will thrive in your area.

For instance, if you live in a warmer zone (like zone 9), you might opt for heat-tolerant plants such as succulents or tropical flowers. Conversely, in cooler zones (like zone 4), hardy perennials like daylilies or hostas would be more appropriate. Local extension services or garden centers can provide valuable insights into suitable plants for your region.

Soil Preparation and Fertilization Basics

Healthy soil is the foundation of any successful garden. Begin by testing your soil to understand its pH and nutrient levels. You can purchase a soil testing kit or send a sample to a local extension service. Based on the results, you may need to amend your soil with organic matter, such as compost or well-rotted manure, to improve fertility and drainage.

Fertilization is also key. Consider using slow-release fertilizers that provide nutrients over time, or organic options like bone meal for phosphorus, which supports root development. A general rule of thumb is to fertilize your plants at the beginning of the growing season and again mid-season for optimal growth.

Watering Techniques: Timing and Methods

Watering is often overlooked but is crucial for plant health. The best time to water is early in the morning or late in the evening when temperatures are cooler, minimizing evaporation. Aim for deep watering rather than frequent shallow watering to encourage deep root growth.

Consider using various watering methods:

  • Drip irrigation: Efficiently delivers water directly to the plant roots.
  • Soaker hoses: Allow water to seep through porous materials, ideal for garden beds.
  • Hand watering: Provides control and is often necessary for container plants.

Monitor the soil moisture level to determine when to water. A simple test is to stick your finger into the soil; if it feels dry an inch down, it’s time to water.

Home Improvement Projects to Enhance Value

Improving your home not only enhances your living experience but can also significantly increase property value. This section will explore high-impact home improvement projects that provide the best returns on investment.

Identifying High-Impact Areas for Renovation

When considering home renovations, focus on areas that potential buyers value the most. According to Remodeling Magazine’s Cost vs. Value report, kitchen and bathroom remodels typically yield the highest returns. Simple updates, such as new fixtures, countertops, or cabinetry, can make a substantial difference without breaking the bank.

Additionally, curb appeal is critical. Investing in landscaping, exterior painting, or new siding can enhance first impressions and drive interest in your home. For example, a homeowner who invested $5,000 in landscaping improvements saw an increase in offers when selling their property.

Energy Efficiency Upgrades: Insulation and Windows

Energy efficiency upgrades not only lower utility bills but also appeal to eco-conscious buyers. Start with insulation, which is crucial for maintaining temperature control within the home. According to the U.S. Department of Energy, proper insulation can reduce heating and cooling costs by 20% or more.

Upgrading windows to energy-efficient models can also make a significant impact. Double or triple-pane windows minimize heat loss, while low-E coatings reflect heat back into the home. Though the initial investment may seem high, the long-term savings on energy bills and increased home value often justify the cost.

DIY vs. Hiring Professionals: Making the Right Choice

Deciding whether to tackle home improvement projects yourself or hire professionals can be challenging. Consider these factors:

  • Skill level: Assess your own abilities. If a project requires specialized skills (like electrical work), it’s often best to hire a professional.
  • Time constraints: If you have limited time, hiring professionals can ensure timely completion.
  • Cost: DIY projects can save money, but be wary of potential mistakes that can lead to costly repairs.

For smaller projects, such as painting or landscaping, DIY can be rewarding and cost-effective. However, for larger renovations, investing in professionals can save time and ensure quality workmanship.

Advanced Landscaping Strategies

For homeowners looking to take their landscaping to the next level, advanced strategies can help create a stunning and sustainable outdoor environment. This section will explore permaculture principles, hardscaping, and the integration of technology.

Creating a Sustainable Garden: Permaculture Principles

Permaculture is a holistic approach to gardening and landscaping that works with nature rather than against it. The core principles of permaculture emphasize sustainability, biodiversity, and resilience. Start by observing your garden space: note the sunlight patterns, wind directions, and water availability.

Implement strategies such as:

  • Companion planting: Pairing plants that benefit each other, like tomatoes and basil, can improve growth and repel pests.
  • Mulching: Applying organic mulch retains moisture, suppresses weeds, and enriches the soil as it decomposes.
  • Rainwater harvesting: Collecting rainwater reduces water usage and provides a sustainable source for irrigation.

By incorporating these principles, you can create an eco-friendly garden that thrives while minimizing your environmental impact.

Incorporating Hardscaping: Patios, Pathways, and Walls

Hardscaping elements enhance both the functionality and aesthetics of your outdoor space. Patios provide areas for relaxation and entertainment, while pathways can guide visitors through your garden. Retaining walls can define spaces and prevent soil erosion.

When designing hardscaping features, consider materials that complement your home and garden style. For example, natural stone or brick can create a rustic look, while concrete offers a modern aesthetic. Be mindful of drainage and accessibility to ensure these structures are both practical and beautiful.

Using Technology: Smart Irrigation and Garden Management Tools

In today’s digital age, technology can significantly enhance garden management. Smart irrigation systems can automate watering schedules based on weather conditions, conserving water and ensuring plants receive adequate moisture. For instance, systems like Rachio or RainMachine allow you to control your irrigation from your smartphone.

Additionally, garden management apps can help you track plant health, growth progress, and care routines. Apps like PlantSnap can identify plants and provide care tips, making it easier for homeowners to maintain their gardens effectively.

Seasonal Home and Garden Maintenance Tips

Maintaining a home and garden requires seasonal attention to ensure longevity and beauty throughout the year. This section offers essential maintenance tips tailored to each season.

Spring Cleaning and Preparation for the Growing Season

Spring is the perfect time to refresh your home and garden. Start by decluttering living spaces and deep cleaning. In the garden, remove debris and dead plants to prepare for new growth. Conduct a soil test and amend it as necessary to ensure optimal growing conditions.

Additionally, consider starting seeds indoors or purchasing seedlings for transplanting. Spring is also an excellent time to apply pre-emergent herbicides to control weeds before they sprout.

Winterization Strategies for Home and Garden

As colder weather approaches, preparing your home and garden for winter is crucial to prevent damage. In the garden, cut back perennials and protect vulnerable plants with mulch or burlap. Drain and store garden hoses to prevent freezing.

For your home, check insulation, seal gaps around windows and doors, and ensure your heating system is functioning efficiently. These proactive steps can save on energy costs and prevent costly repairs in the spring.

Seasonal Pest Control: Prevention and Treatment Methods

Pest control is a year-round concern for homeowners. Seasonal pest management strategies can help keep unwanted invaders at bay. In the spring, focus on prevention by maintaining healthy plant conditions and employing companion planting to deter pests.

In summer, monitor for signs of infestations and treat early. Organic solutions like neem oil or insecticidal soap can be effective without harming beneficial insects. As fall approaches, take measures to prevent pests from overwintering in your home, such as sealing entry points and removing food sources.